Current version: 3.1.0
This version of FlatBook is the result of a long lasting development period. It includes a new theme structure and features many new customizing options and style settings (based on a different framework than the previous versions) to stay up to date with the latest WordPress development standards. If you are using an older version of FlatBook (before v3.0), when you update the theme you will have to setup your website again.
Getting Started
In this section you can learn more about getting started with your WordPress project using FlatBook theme. If
you don't have much experience with WordPress, it is highly recommended to follow the steps in this section
carefully as it comes in order, to setup your starter website and demo content successfully. So let's begin!
System Requirements
To use FlatBook WordPress theme correctly, you must be running:
- WordPress 5.9 or higher
- PHP 7.3 or higher
- MySQL 5 or higher version.
Your demo content install may fails and similar issues occur if you have a low PHP configuration limit
settings. You can either increase these limits on your own, or contact your web host and ask to have the
limits increased to the following minimums:
- PHP Version: 7.3
- Memory Limit: 256M
- Post Max Size: 128M
- PHP Max Input: 300
Included Files
After you downloaded the theme package from ThemeForest, unzip the FlatBook Package folder and open it.
Inside the package, you will find the following files and folders:
-
FlatBook Package
- Docs
- Psd
- Theme
- flatbook.zip
- flatbook-child.zip
Theme Installion
Assumed that you have your WordPress installed and ready to go, you have two ways to install the theme:
Install From WordPress
- Navigate to Appearance » Themes » Add New
- Select the Upload Theme tab at the top of the screen and click Browse
- Locate the zipped theme file flatbook.zip from the /Theme folder of the
downloaded package and hit Install Now
- Once successfully installed, click Activate
Install Using FTP
- Connect to your webhost via FTP connection
- Upload the contents of the unzipped theme file flatbook.zip to the
../wp-content/themes/ location
- Once finished, log in to your WordPress admin and go to Appearance » Themes and under Flatbook click Activate
Note: When uploading the theme, please make sure that you choose
flatbook.zip file, not entire package you downloaded from ThemeForest. If you upload the wrong file, you will
get an error saying “missing style.css”
Plugin Installion
When the theme is successfully installed and activated, you will see a notice message at the top of your
dashboard screen, asking to install the required plugins** **of the theme.
Click the Begin Install Plugins link and follow the upcoming instructions until the
required plugins of the theme become successfully installed and activated. If you did everything correctly,
the message disappears.
Import Demos
If you need your theme to look exactly the same as in the live theme demo, you will need to import the demo
contents
and settings. For WordPress newbies, it is highly recommended to import the demo content, it makes the
customization process much more easier. It can be good starting ground when starting to customize your site.
Follow the steps below to import demo content:
- Navigate to Appearance » Import Demo Data
- Click on the Import Demo Data button
- In the upcoming window click Continue & Import button
- Wait until the importer finishes (it may take a while).
Initial Settings
Finally, there are a few settings came with the WordPress installion by default, what needs to be changed
before you can start customizing your website.
Permalink Structure
- Navigate to Settings » Permalinks
- Select the Post Name option from the list and Save Changes
Front Page Displays
- Navigate to Settings » Reading
- Set the Front Page Displays option to Static Page
- Select Home for Front Page, and Blog for Posts Page
and Save Changes
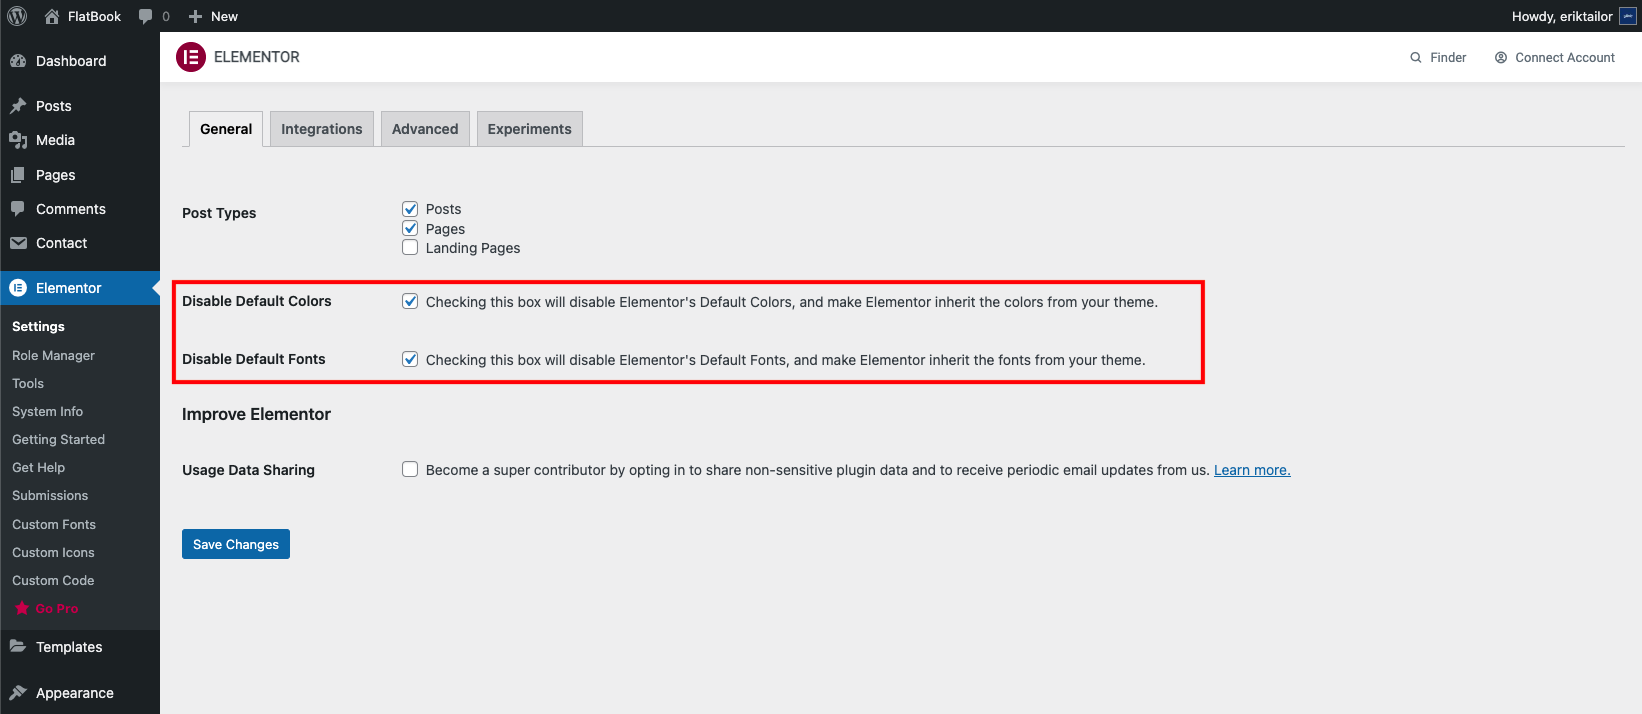
Disable Default Styles
- Navigate to Elementor » Settings
- Check the Disable Default Colors and Disable Default Fonts checkbox
and Save Changes
Congrats! For now, all contents has been successfully
imported, you are ready to customize!
Theme Customization
FlatBook comes with a live theme customizer with more than 100+ customizing options included,
what gives you the ability to modify the layout, typography, colors and many other settings instantly -
without need to refresh the page - what makes the theme customization process quick and easy.
To open the Live Theme Customizer, go to Appearance » Customize
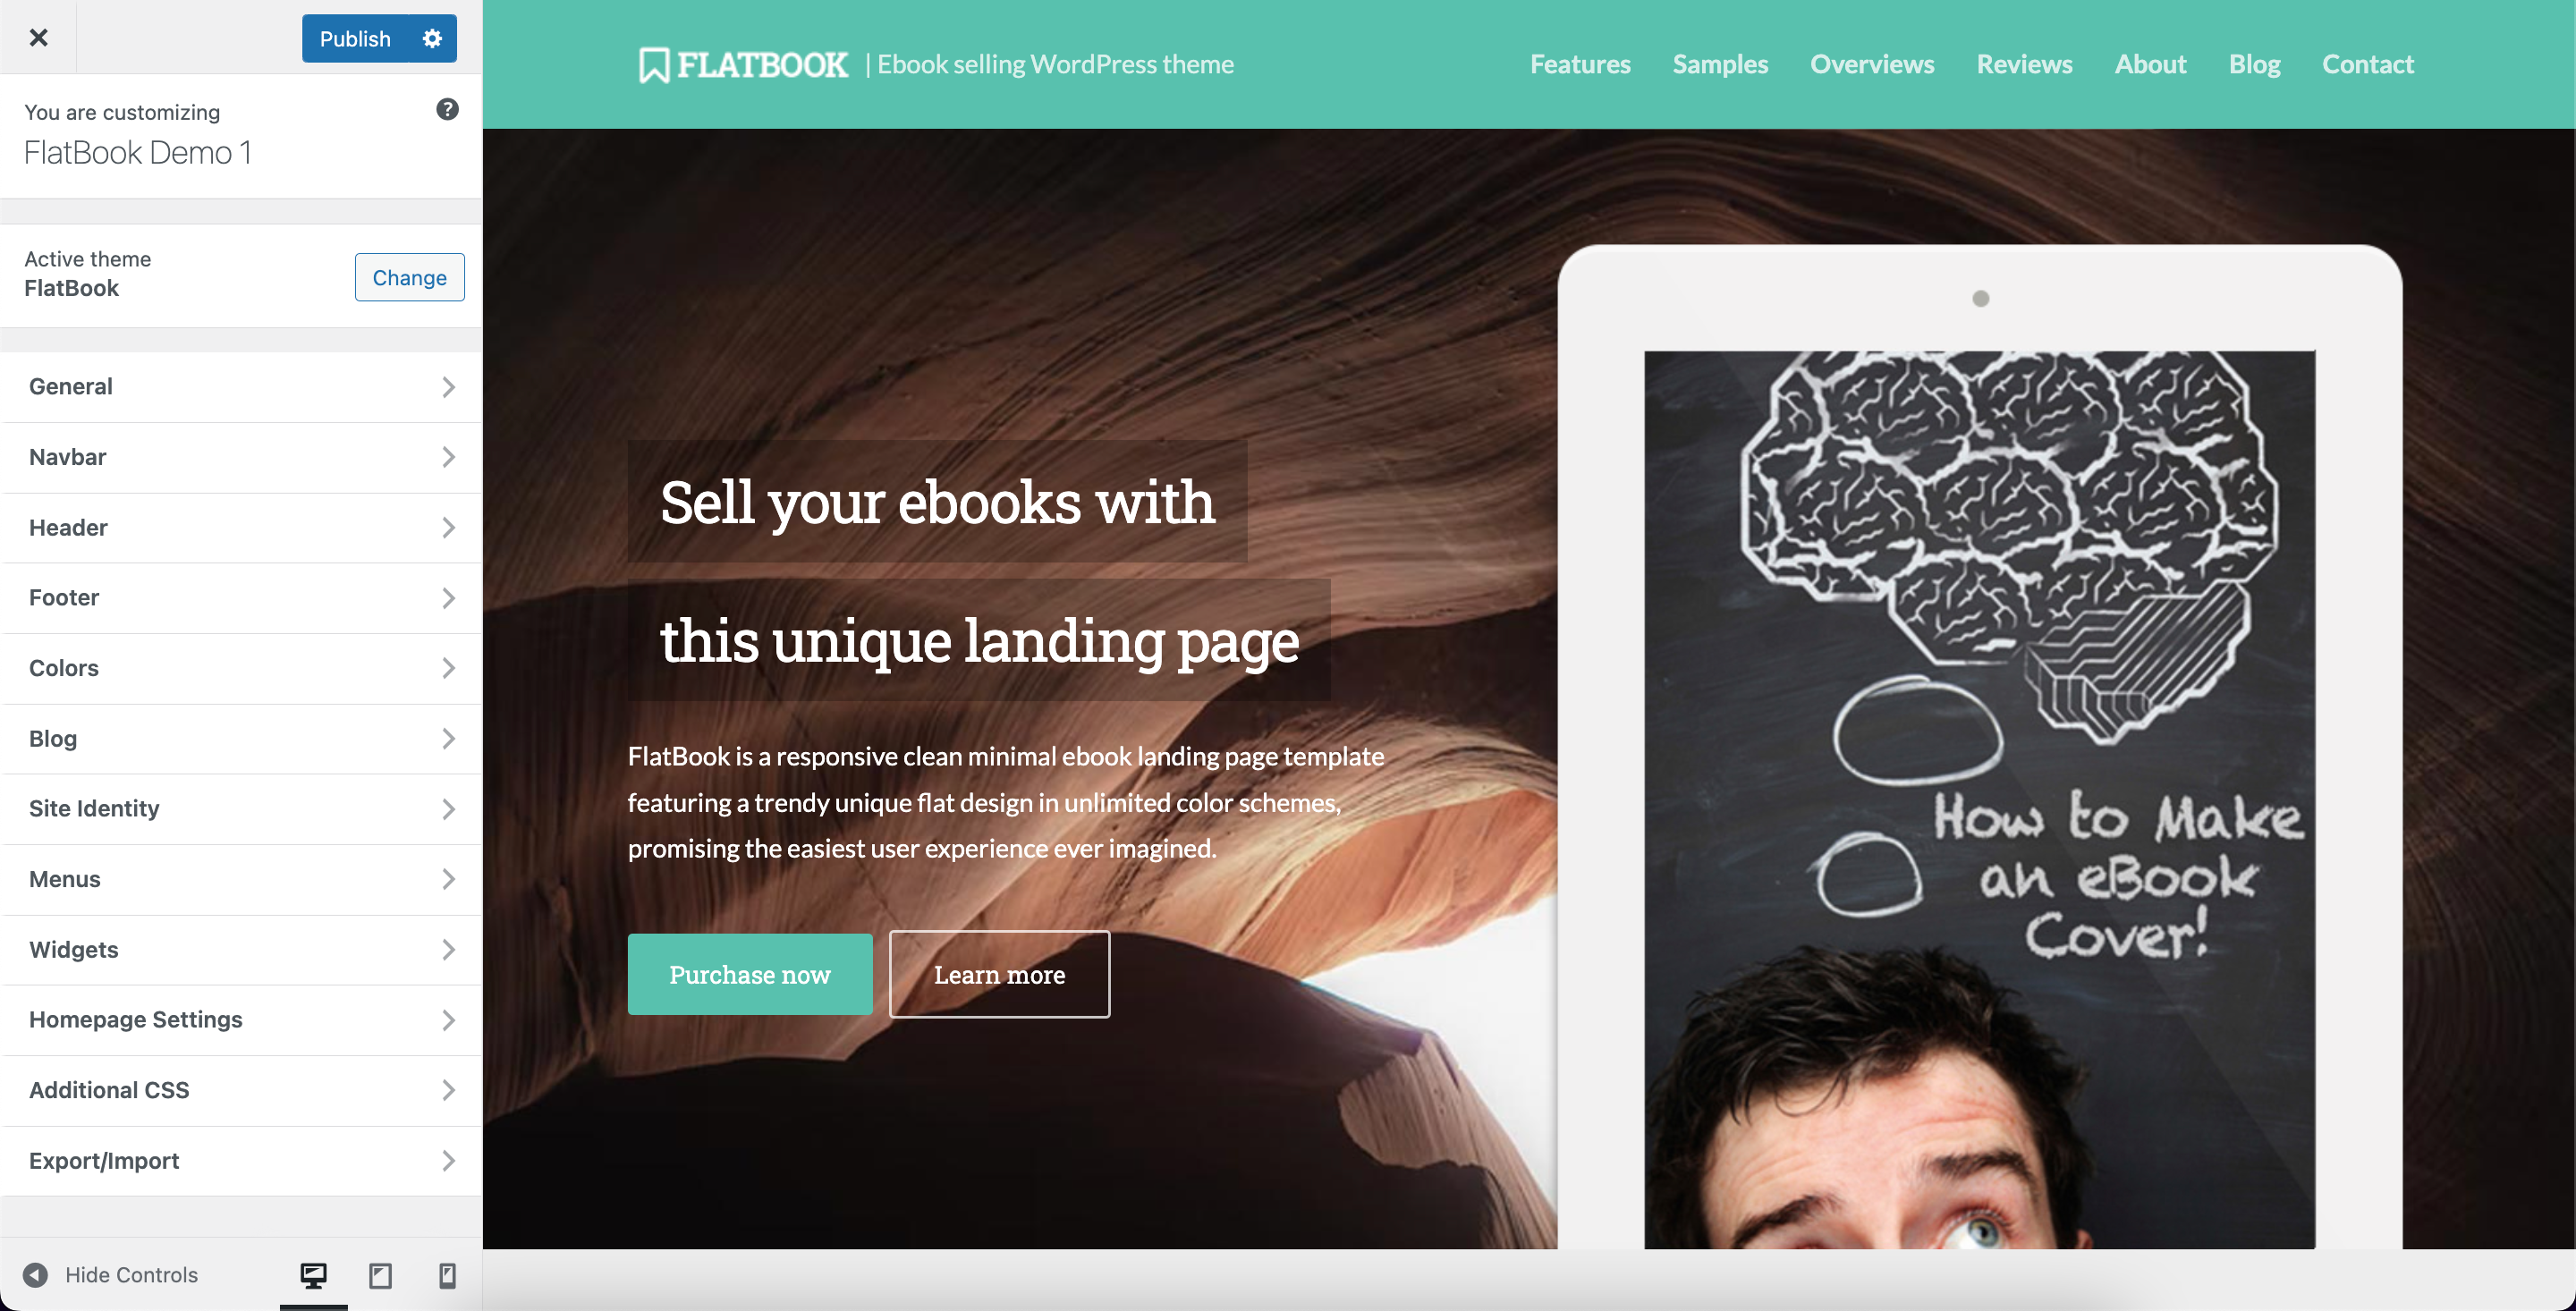
General
The General panel groups the most common settings of the site.
Site Identity
Set the site basics in this setting panel.
- Site Title: enter the default title of the site. It is displayed in browser tabs before
the page title
- Tagline: enter the tagline of the site. It is basically a short description of what is
your site about
- Site Icon: upload an image to be used as the favicon of the site. It is displayed in
browser tabs
Homepage
Choose what to display as the homepage of your site.
If you set A static page, you can choose the Homepage and the Posts page from your pages.
Typography
- Body Font: sets the default font family and size used for body text
- Headings: sets the default font family and sizes used for headings
Socials
Here you can add your social networks, as many as you like, and reorder / delete if not needed. You can
display the social icons in the right side of the navbar or the copyright footer, later we will discuss
this. Click on Add social network button, choose a network and enter the link.
Page Loader
In this section you can modify the page preloader animation effect.
- Type: select the layout of the page loader
- Background color: sets the background of the page
- Loader color: sets the color of the page loader
404 Page
- Image: the 404 image above the heading
- Heading: the title of the error page, below the 404 text
- Content: the paragraph in the error page, below the heading
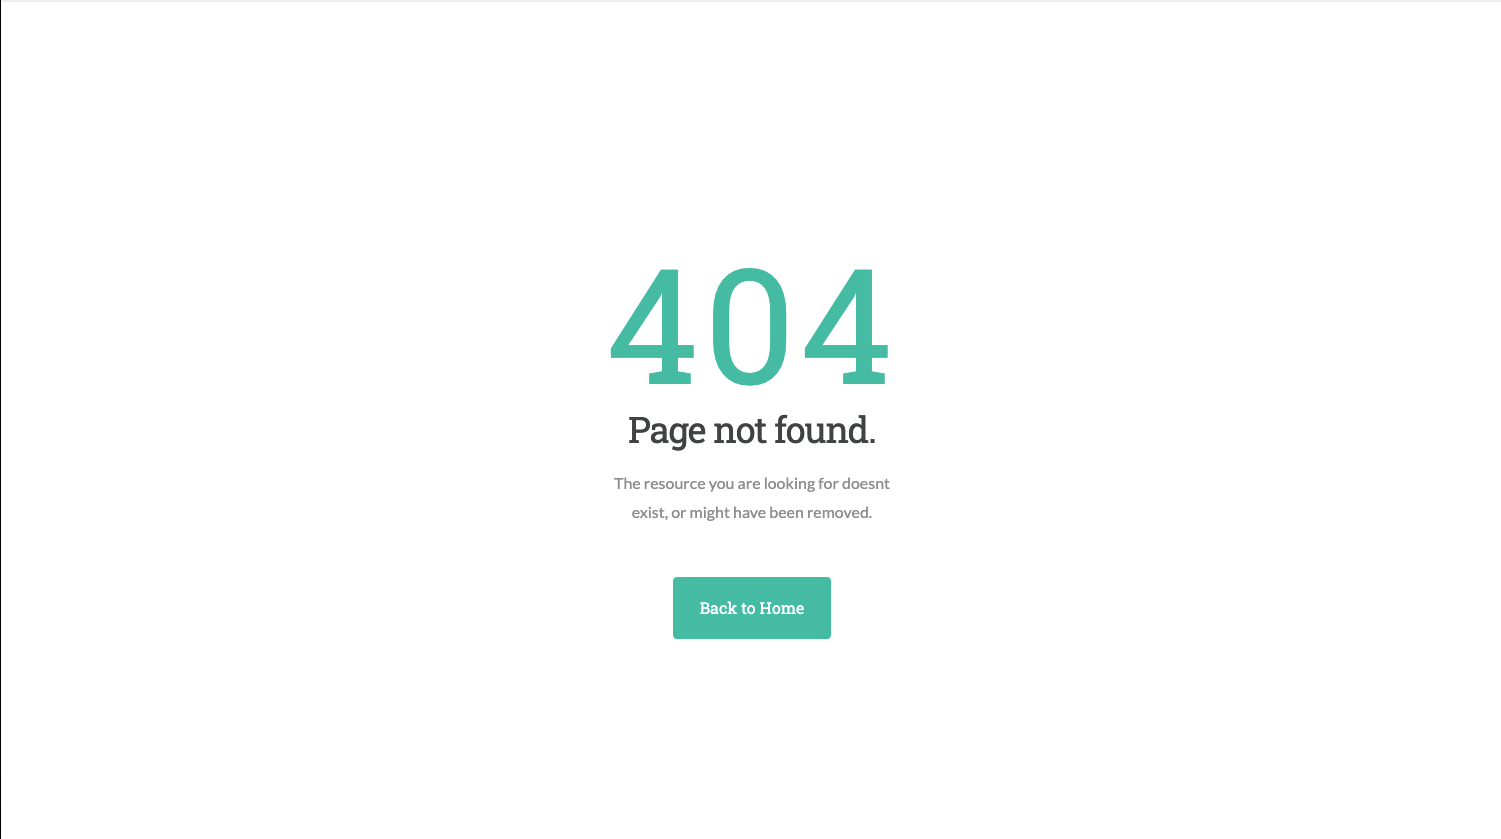
Note: if you don't upload an image, the default "404" heading will show up at the top of the page.
Header
In this panel you will find settings related to the headers of the site.
Topbar
- Enable topbar: show or hide the top information bar above the navbar. It is only
visible, if the Navbar position setting is set to Scroll
- Topbar text: enter the text to be shown in the top information bar
- Topbar alignment: sets the text alignment of the top information bar
- Topbar height: sets the height of the top information bar
- Show on tablet: Set to show or hide the topbar on responsive tablet size.
- Show on mobile: Set to show or hide the topbar on responsive mobile size.
Page headers
- Enable page headers: show or hide page headers on static pages. If it is enabled, a
header bar will show up below the navbar with the page title on every page, instead of the homepage.
- Header height: sets the height of the page header
- Title font size: sets the font size of the page header title
- Header alignment: sets the alignment of content in the page heeader
- Header background: sets the background settings of the page header

Colors
Set the default colors of the theme in this panel.
General
- Primary color: set the base accent color of the theme. It will affect the links,
pricing tables, buttons, divider icons, page loader, icons and tags
- Hover color: set the color of the links, buttons and tags when hovered with the mouse
Typography
- Body text color: sets the color of the basic body copy
- Bold text color: sets the color of the bold text in paragraphs. Affects the b
and strong elements
- Headings color: color: sets the color of the h1-h6 headline titles
Navbar
- Navbar background color: sets the background color of the top navigation bar
- Menu link color: sets the color of the menu links in the top navigation bar
- Menu link hover color: sets the color of the menu links when hovered with the mouse
- Tagline color: sets the tagline color near the footer
- Mobile menu toggle color: sets the color of the mobile menu toggler (hamburger) icon
Header
- Topbar background color: sets the background color of the top information bar
- Topbar text color: sets the text color of the top information bar
- Header title color: sets the heading title color in the page headers
Footer
- Subscribe background color: sets the background color of the footer subscribe bar
- Widgets background color: sets the background color of the footer widgets bar
- Copyright background color: sets the background color of the footer copyright bar
- Copyright text color: sets the color of the footer copyright text
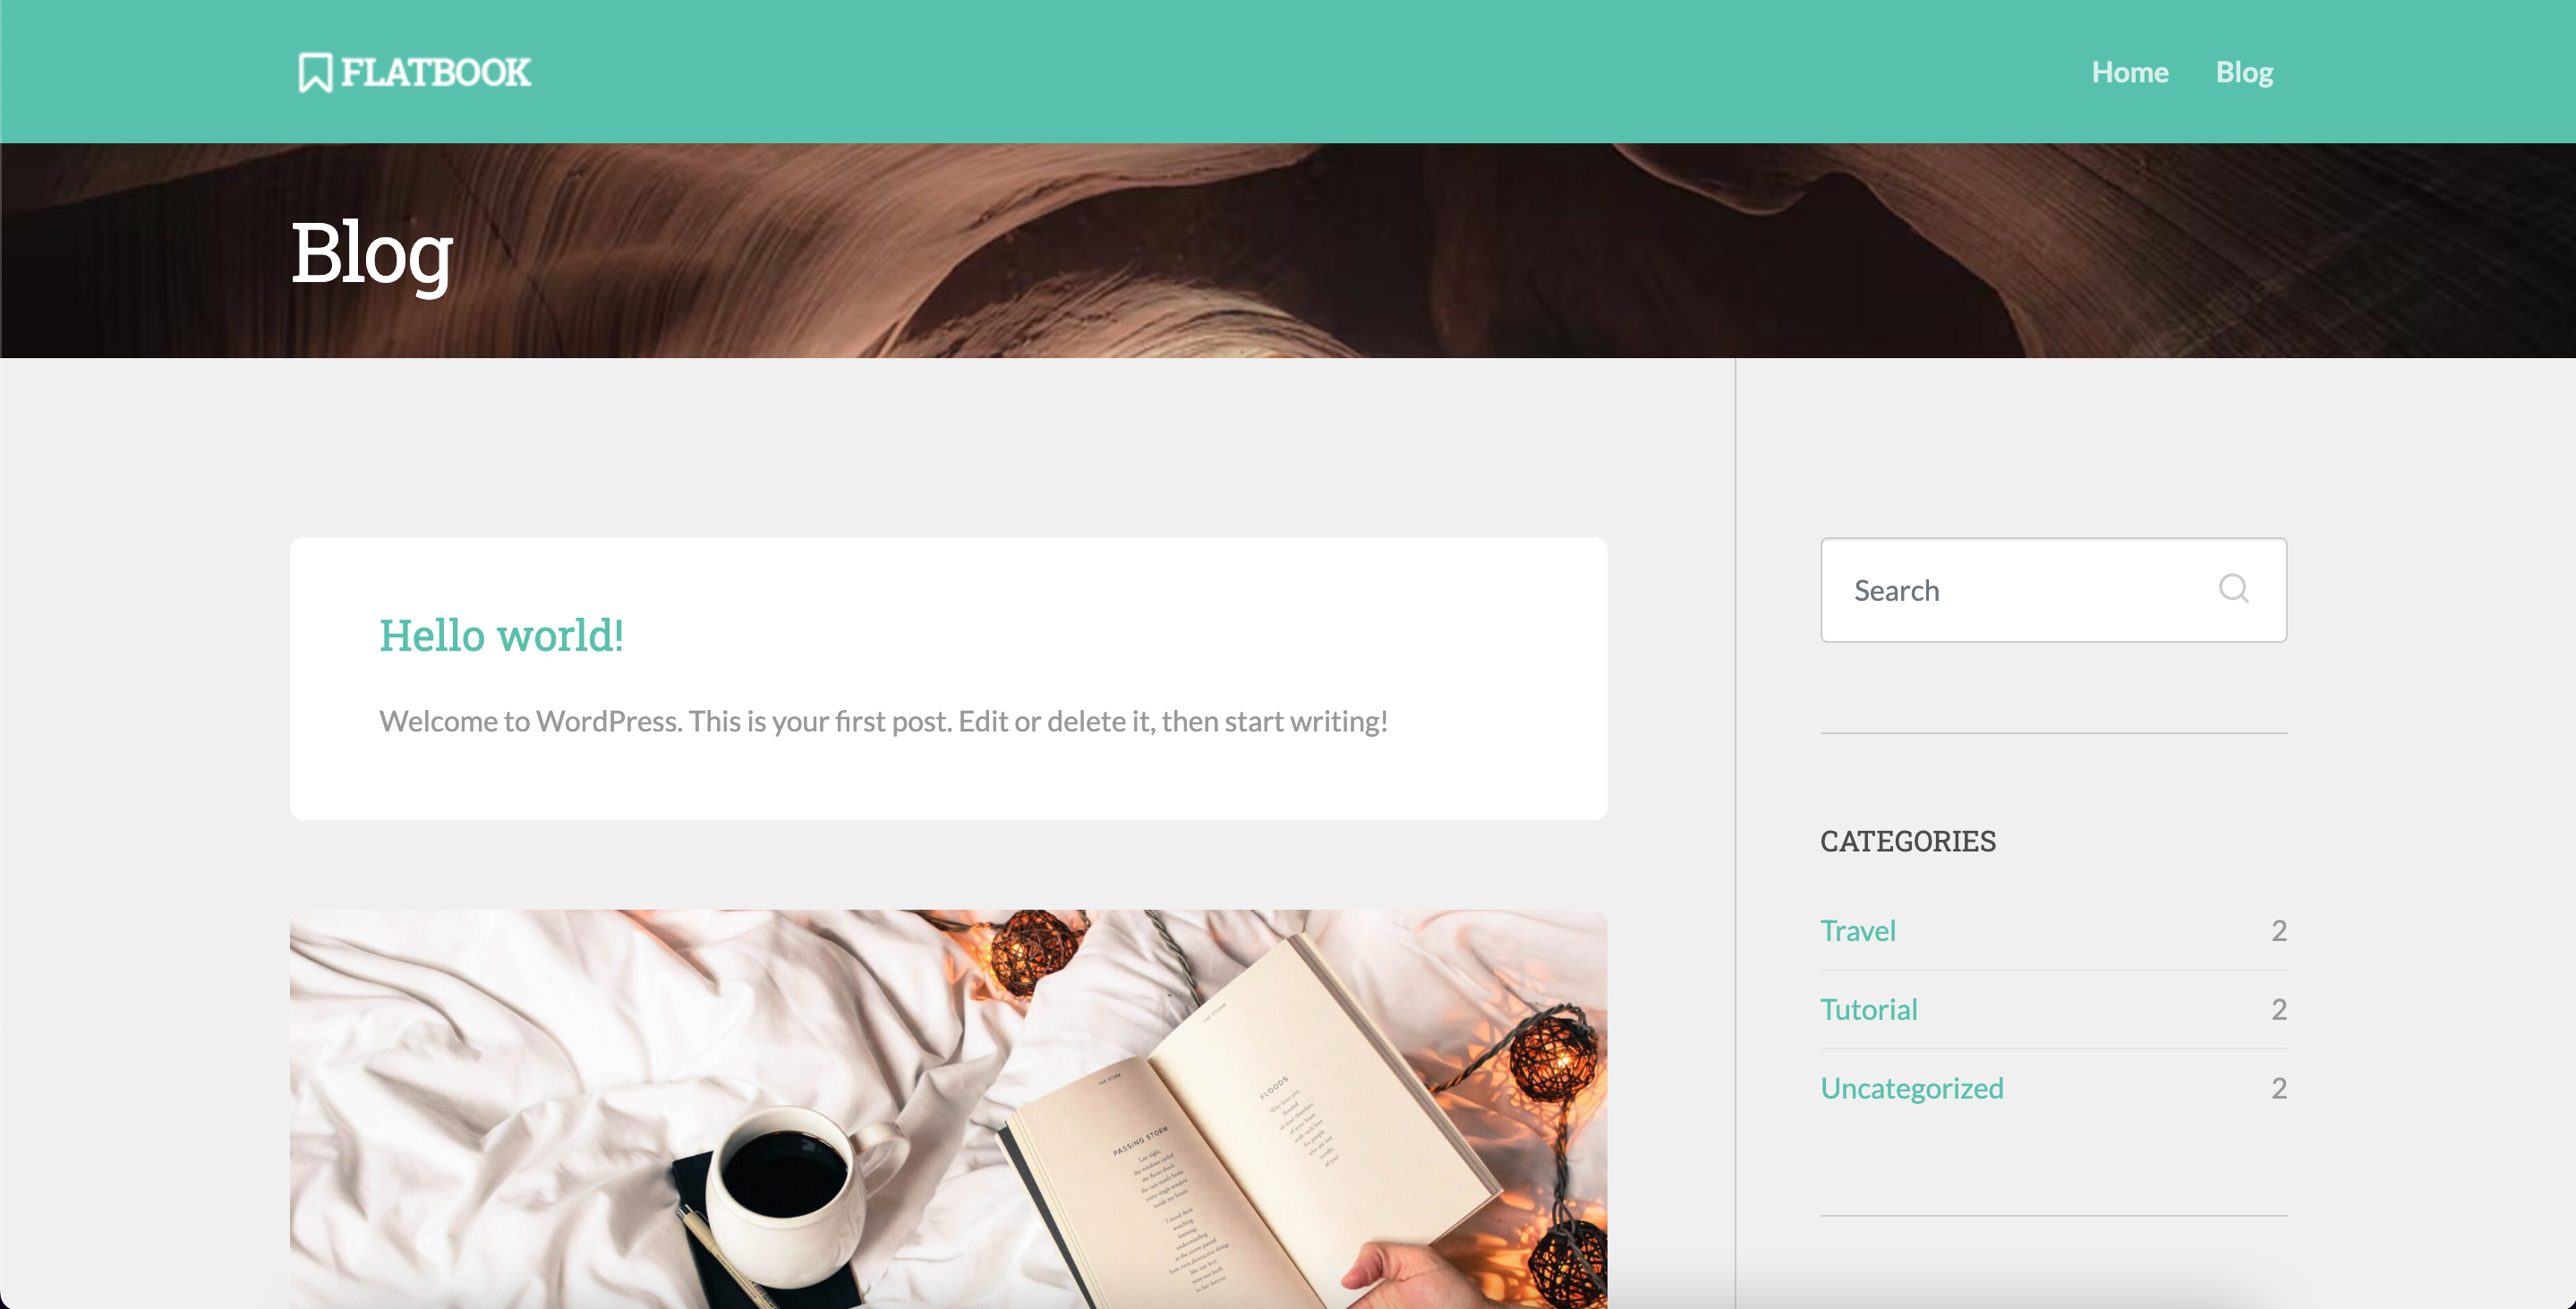
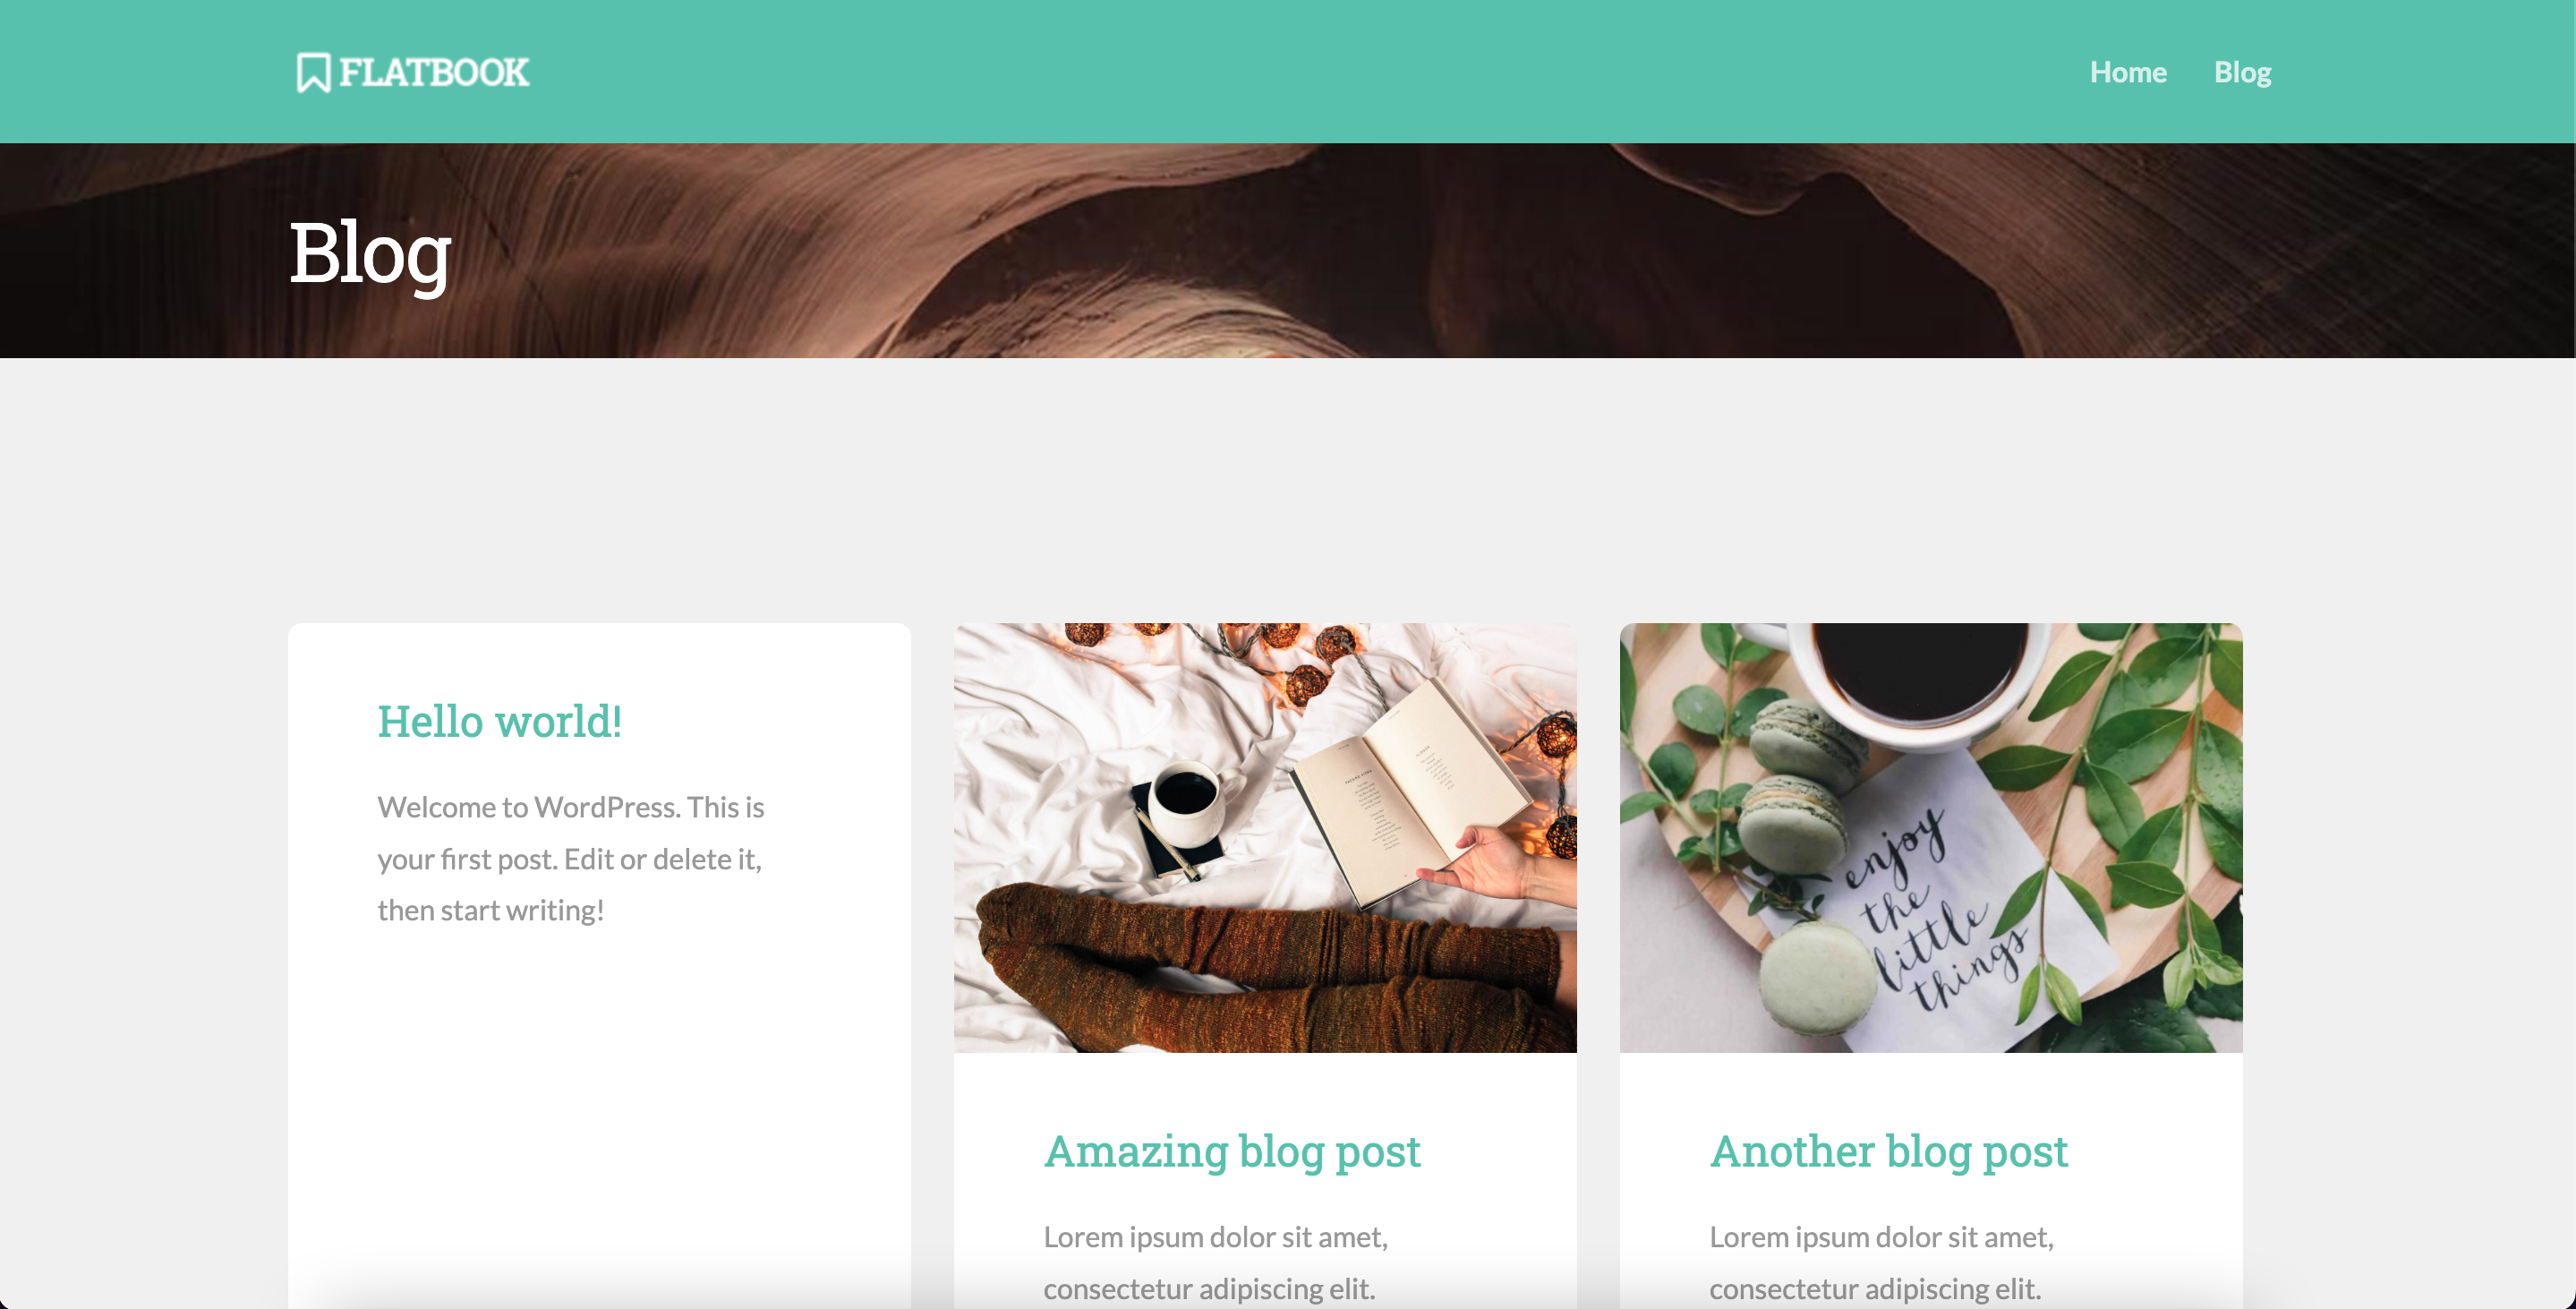
Blog
- Archives background color: sets the background color of the blog archives page
- Single background color: sets the background color of the single post page
Blog
In this settings panel you will find options related to the site blog.
Archives
- Blog header: show or hide the page header of blog archives page
- Blog archive layout: - choose thee layout of the archives page (sidebar, fullwidth,
grid, narrow, masonry, horizontal)
- Show post thumbnails: show or hide post featured image thumbnails
- Show categories: show or hide category links in the top right of the blog post
- Post metas: set which post metas to show up and reorder them
- Excerpt length: set the excerpt length of the blog posts in characters
- Featured image height: set the height of the featured image of each blog post
- Show read more: Set to show or hide the "Continue reading..." link below the excerpt
- Read more text: Enter the text label for the more link below the excerpt
Single Post
- Display sidebar: show or hide sidebar on single posts
- Display navigation: set to show or hide next and previous post links at the bottom
- Display author box: Set to show or hide the author information box below the post
- Display related posts: Set to show or hide related posts (3 posts from the same category)
- Post metas: set which post metas to show up (above the post title) and reorder them
- Single header: show or hide the page header on single posts page
- Header custom title: sets custom headline text to display in the single post's header
- Image height: sets the height of the single post's featured image at the top of the
post
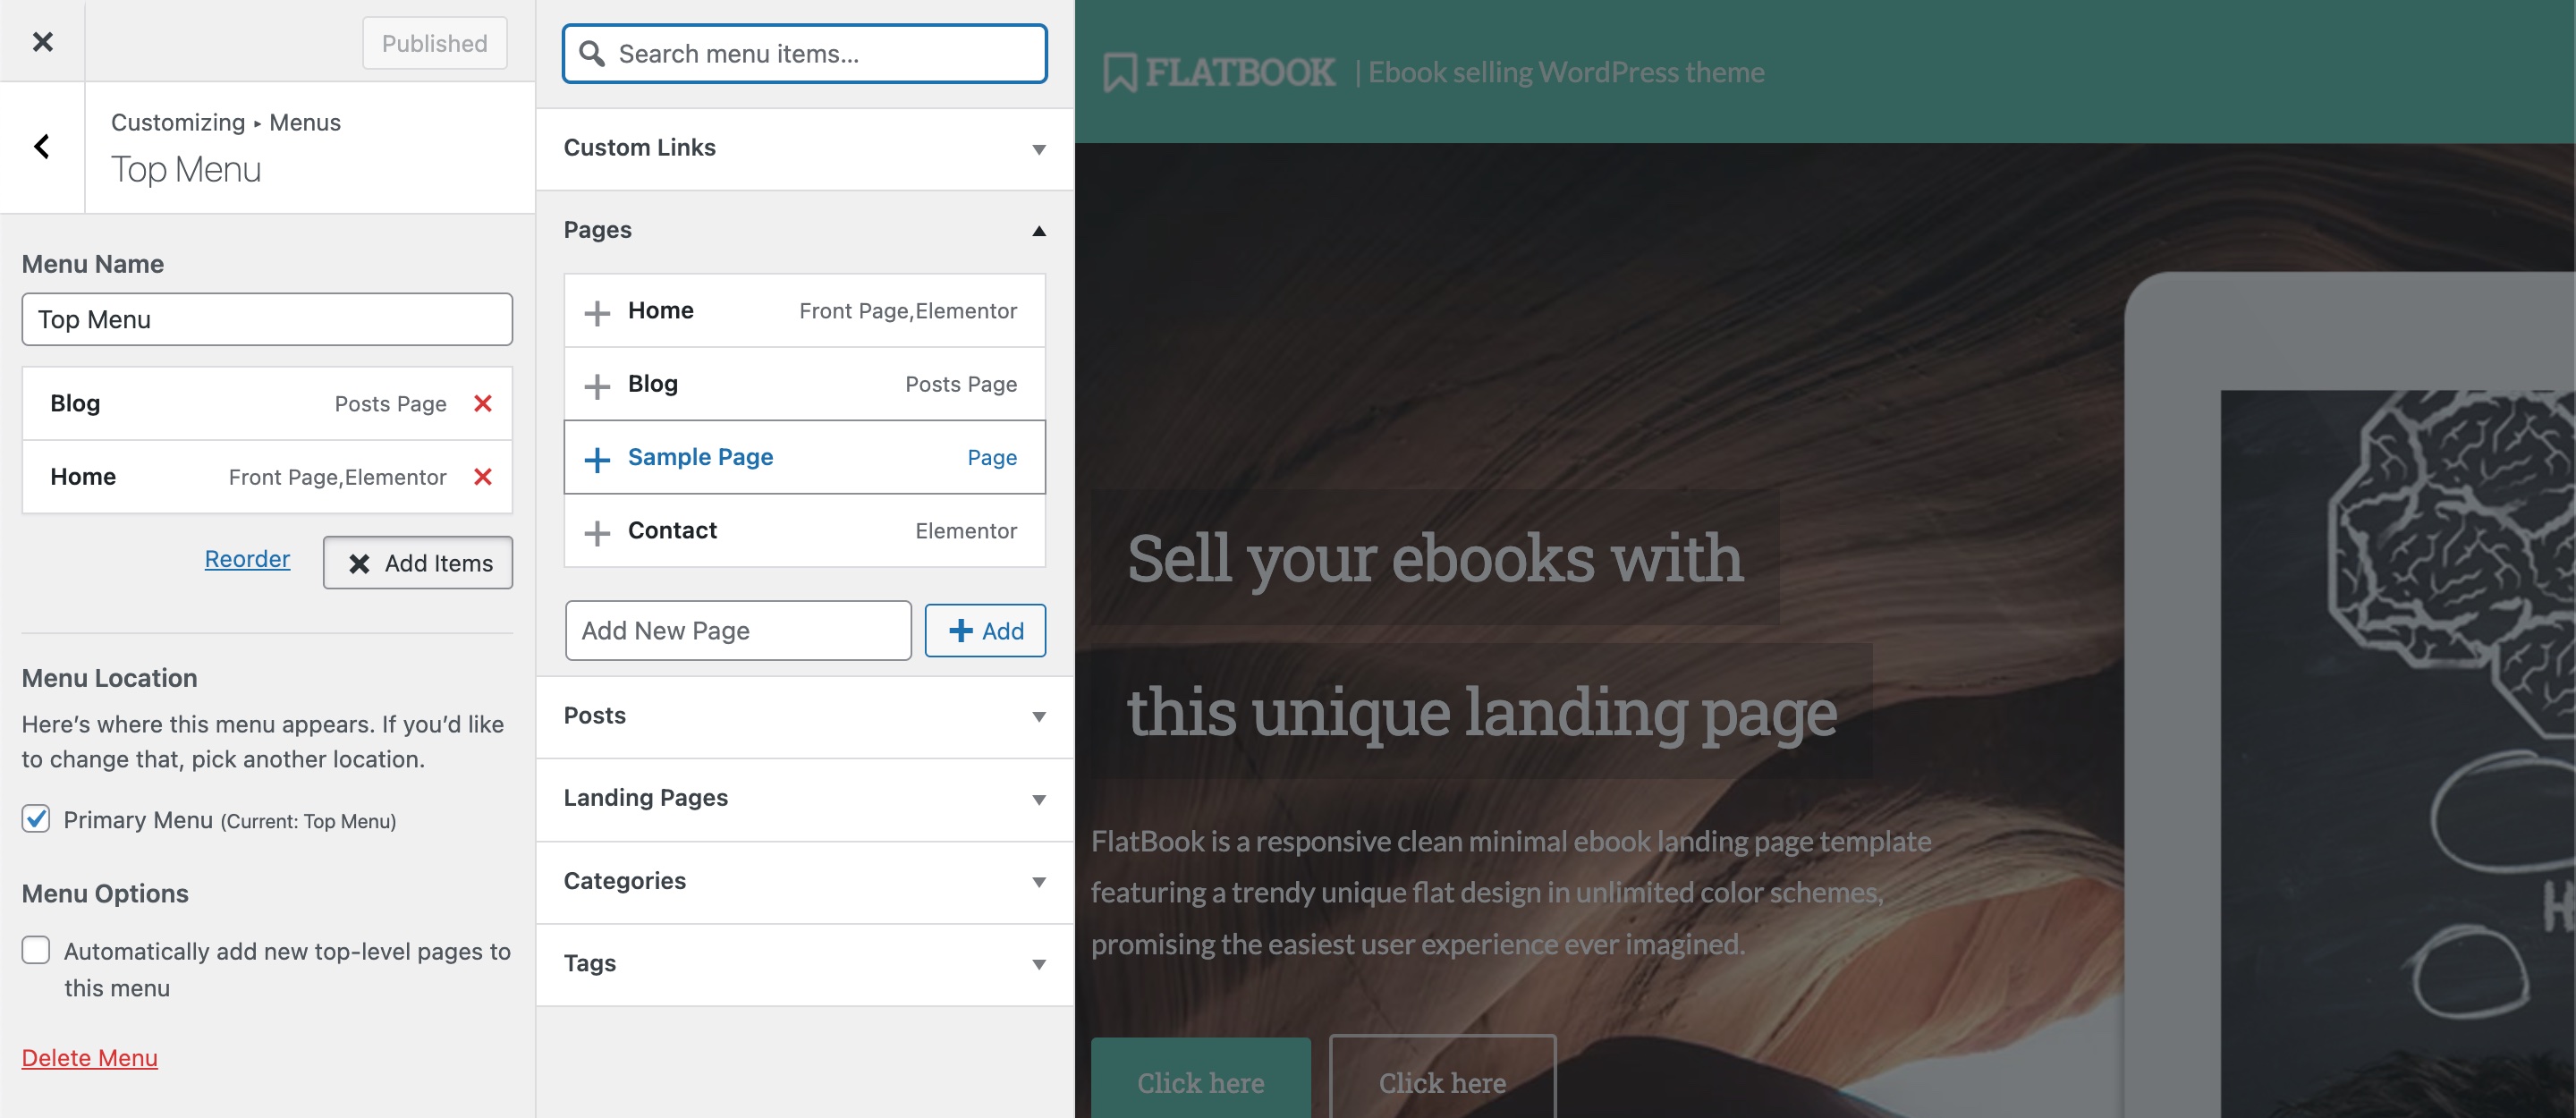
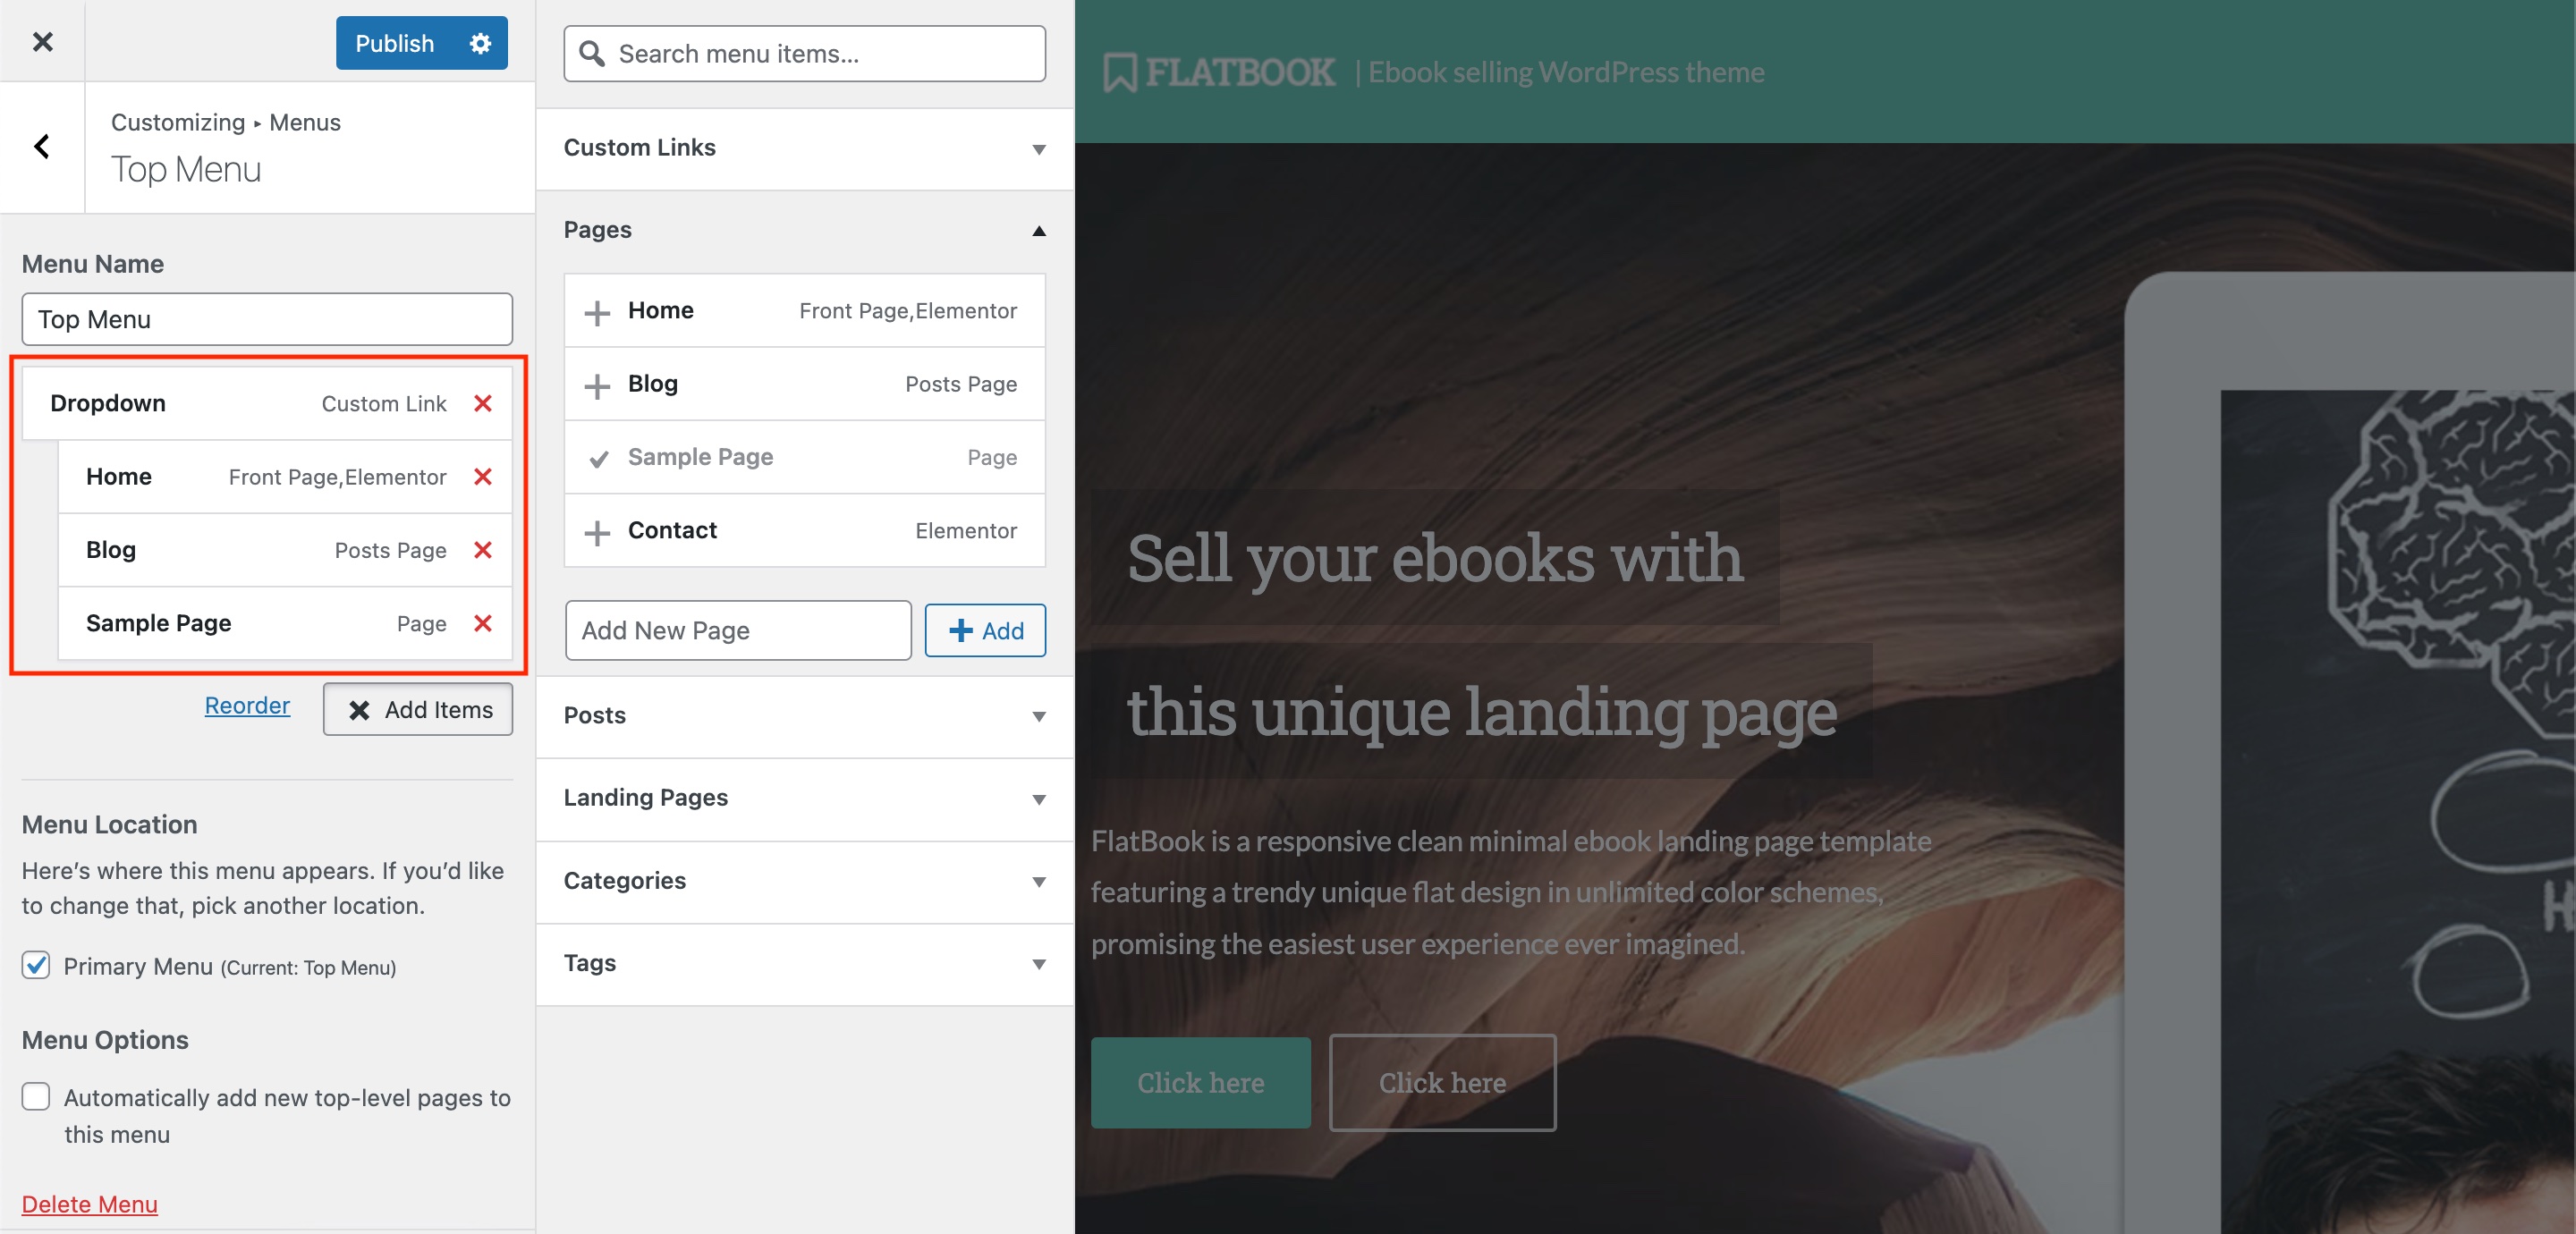
Menus
FlatBook has 1 nav menu location called Primary Menu at the top of the pages. In the Menus section you can
create, edit and manage the menu items of the navbar. You can use three different menu item types, each for
different purpose.
Create a Menu
If you don't have the demo menu coming from the import, you have to create it:
- Navigate to Appearance » Customize » Menus screen
- Click on the Create New Menu button
- Name the menu, and check the Primary Menu checkbox
Page Menu Link
Click on the Add Items button and select items from the Pages box
to create menu items linking to other pages. To create a page menu link, just click on the page name you
would like to add.
Dropdown Menu Link
FlatBook supports dropdown menus until one level depth. It's useful to organize your nav menu links below
each other to look clean. To create dropdown menu link, drag the sub item below the parent
Scroll Menu Link
Use the Custom Links box from the left sidebar when you are creating onepage menu links,
pointing at one of the content sections on the same page. To create a onepage menu link, follow these steps:
- In the Elementor builder, click on a section to edit, and navigate to the Advanced tab
- Enter a custom id for the section, like
book-features
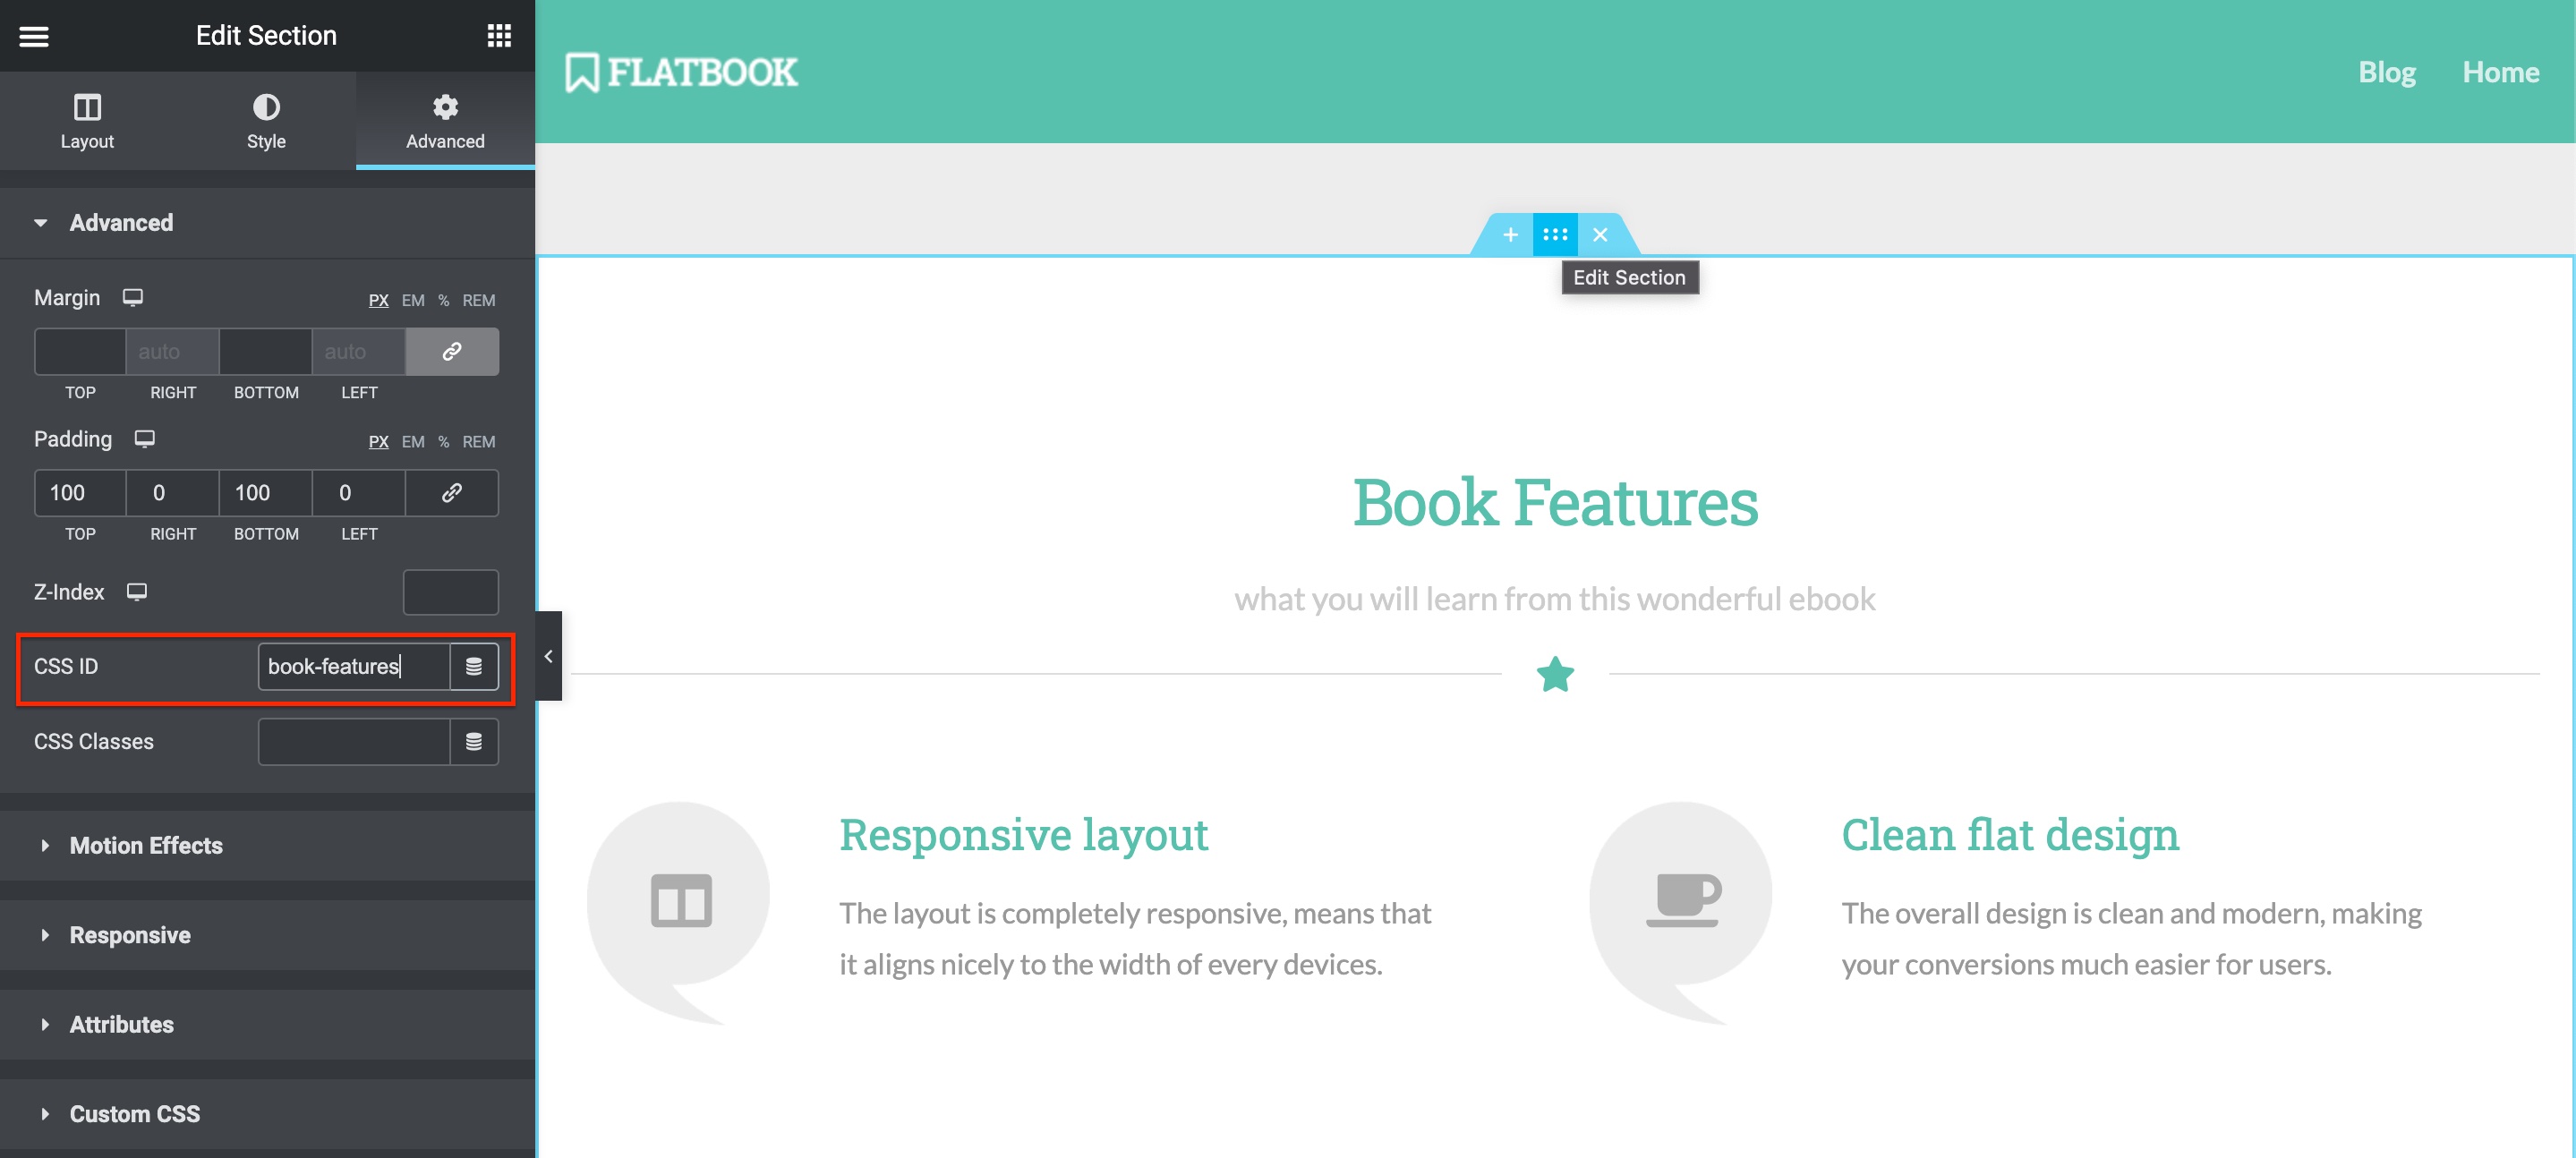
- Enter it in the URL field below Custom Links box, like
#book-features

Other Menu Links
You can create menu items for Posts, Categories and Tags same as you create a page menu link.
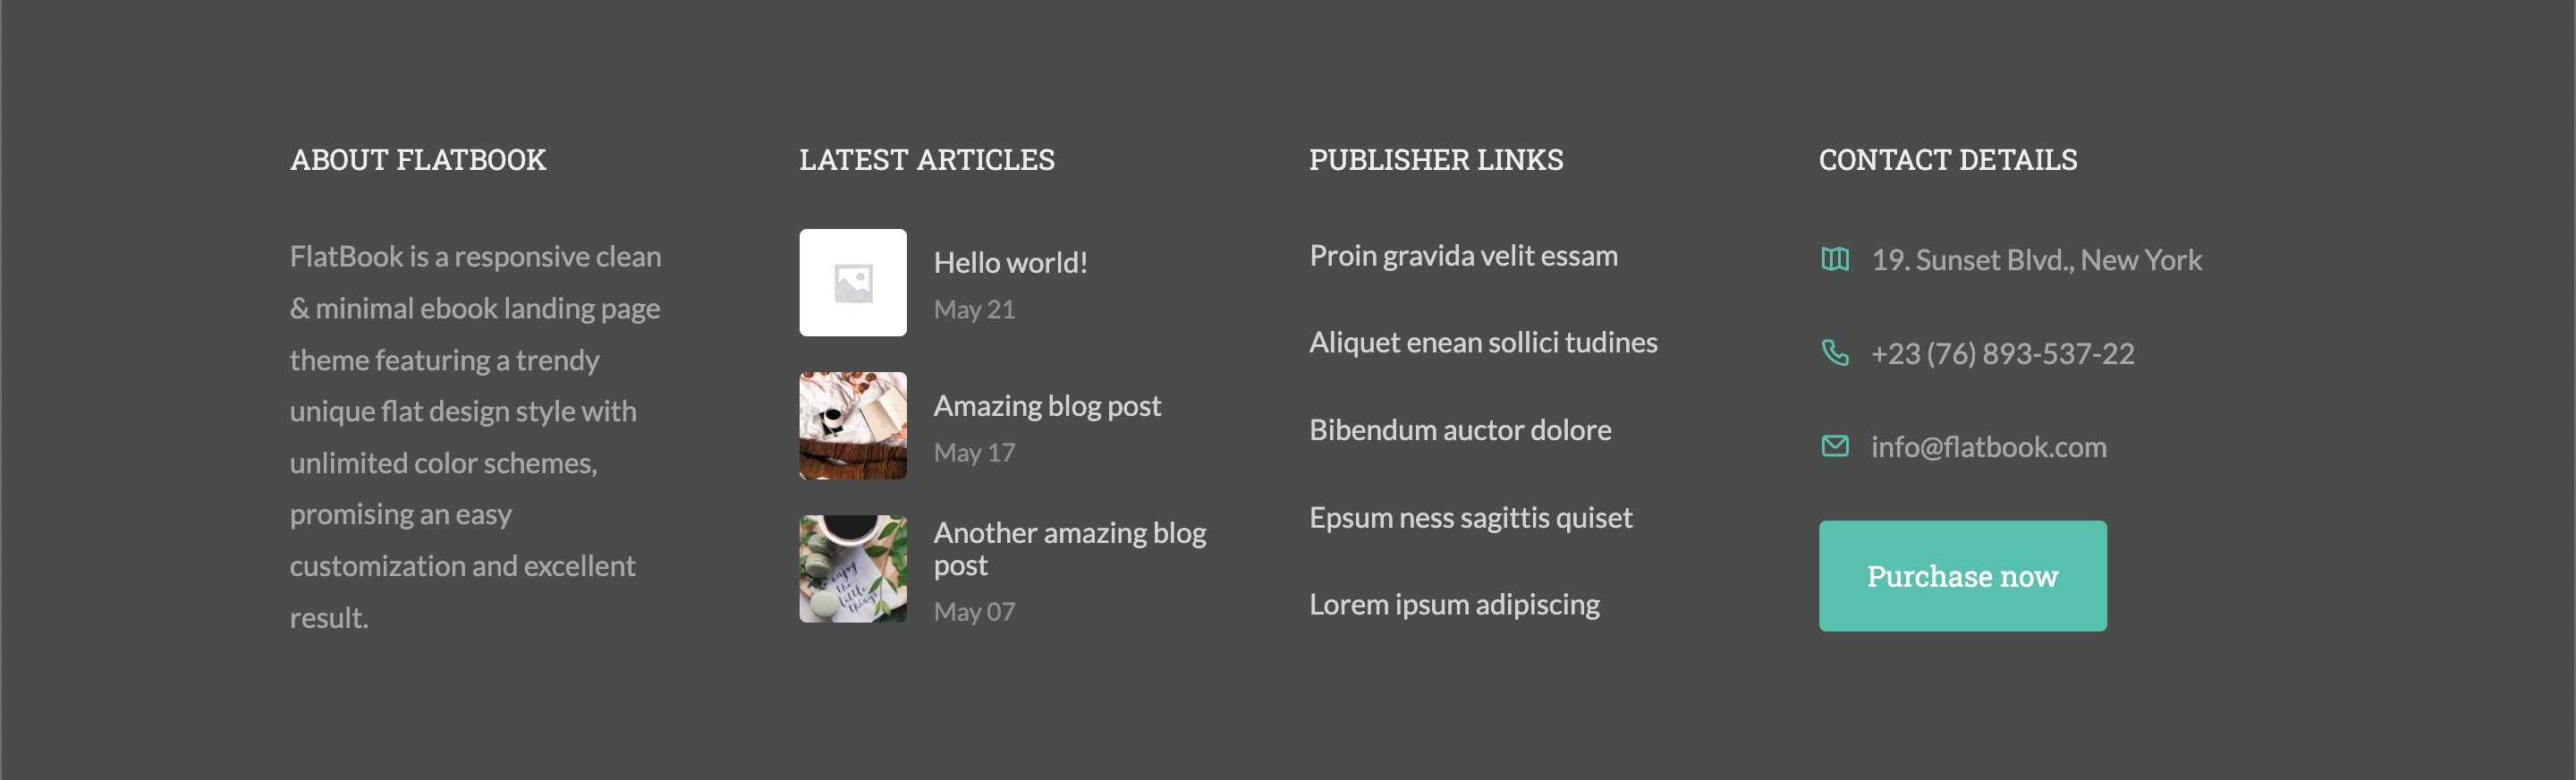
Widgets
FlatBook has two widget areas, you can add 14 kind of custom widgets into it. To add a widget to one of the areas, go to Appearance » Customize » Widgets, select a widget area and click on Add a Widget button.
Footer Widgets
This widget area is placed in the footer above the copyright bar. It's not recommended to add more than 4 widgets, as each one represents a column in the footer.
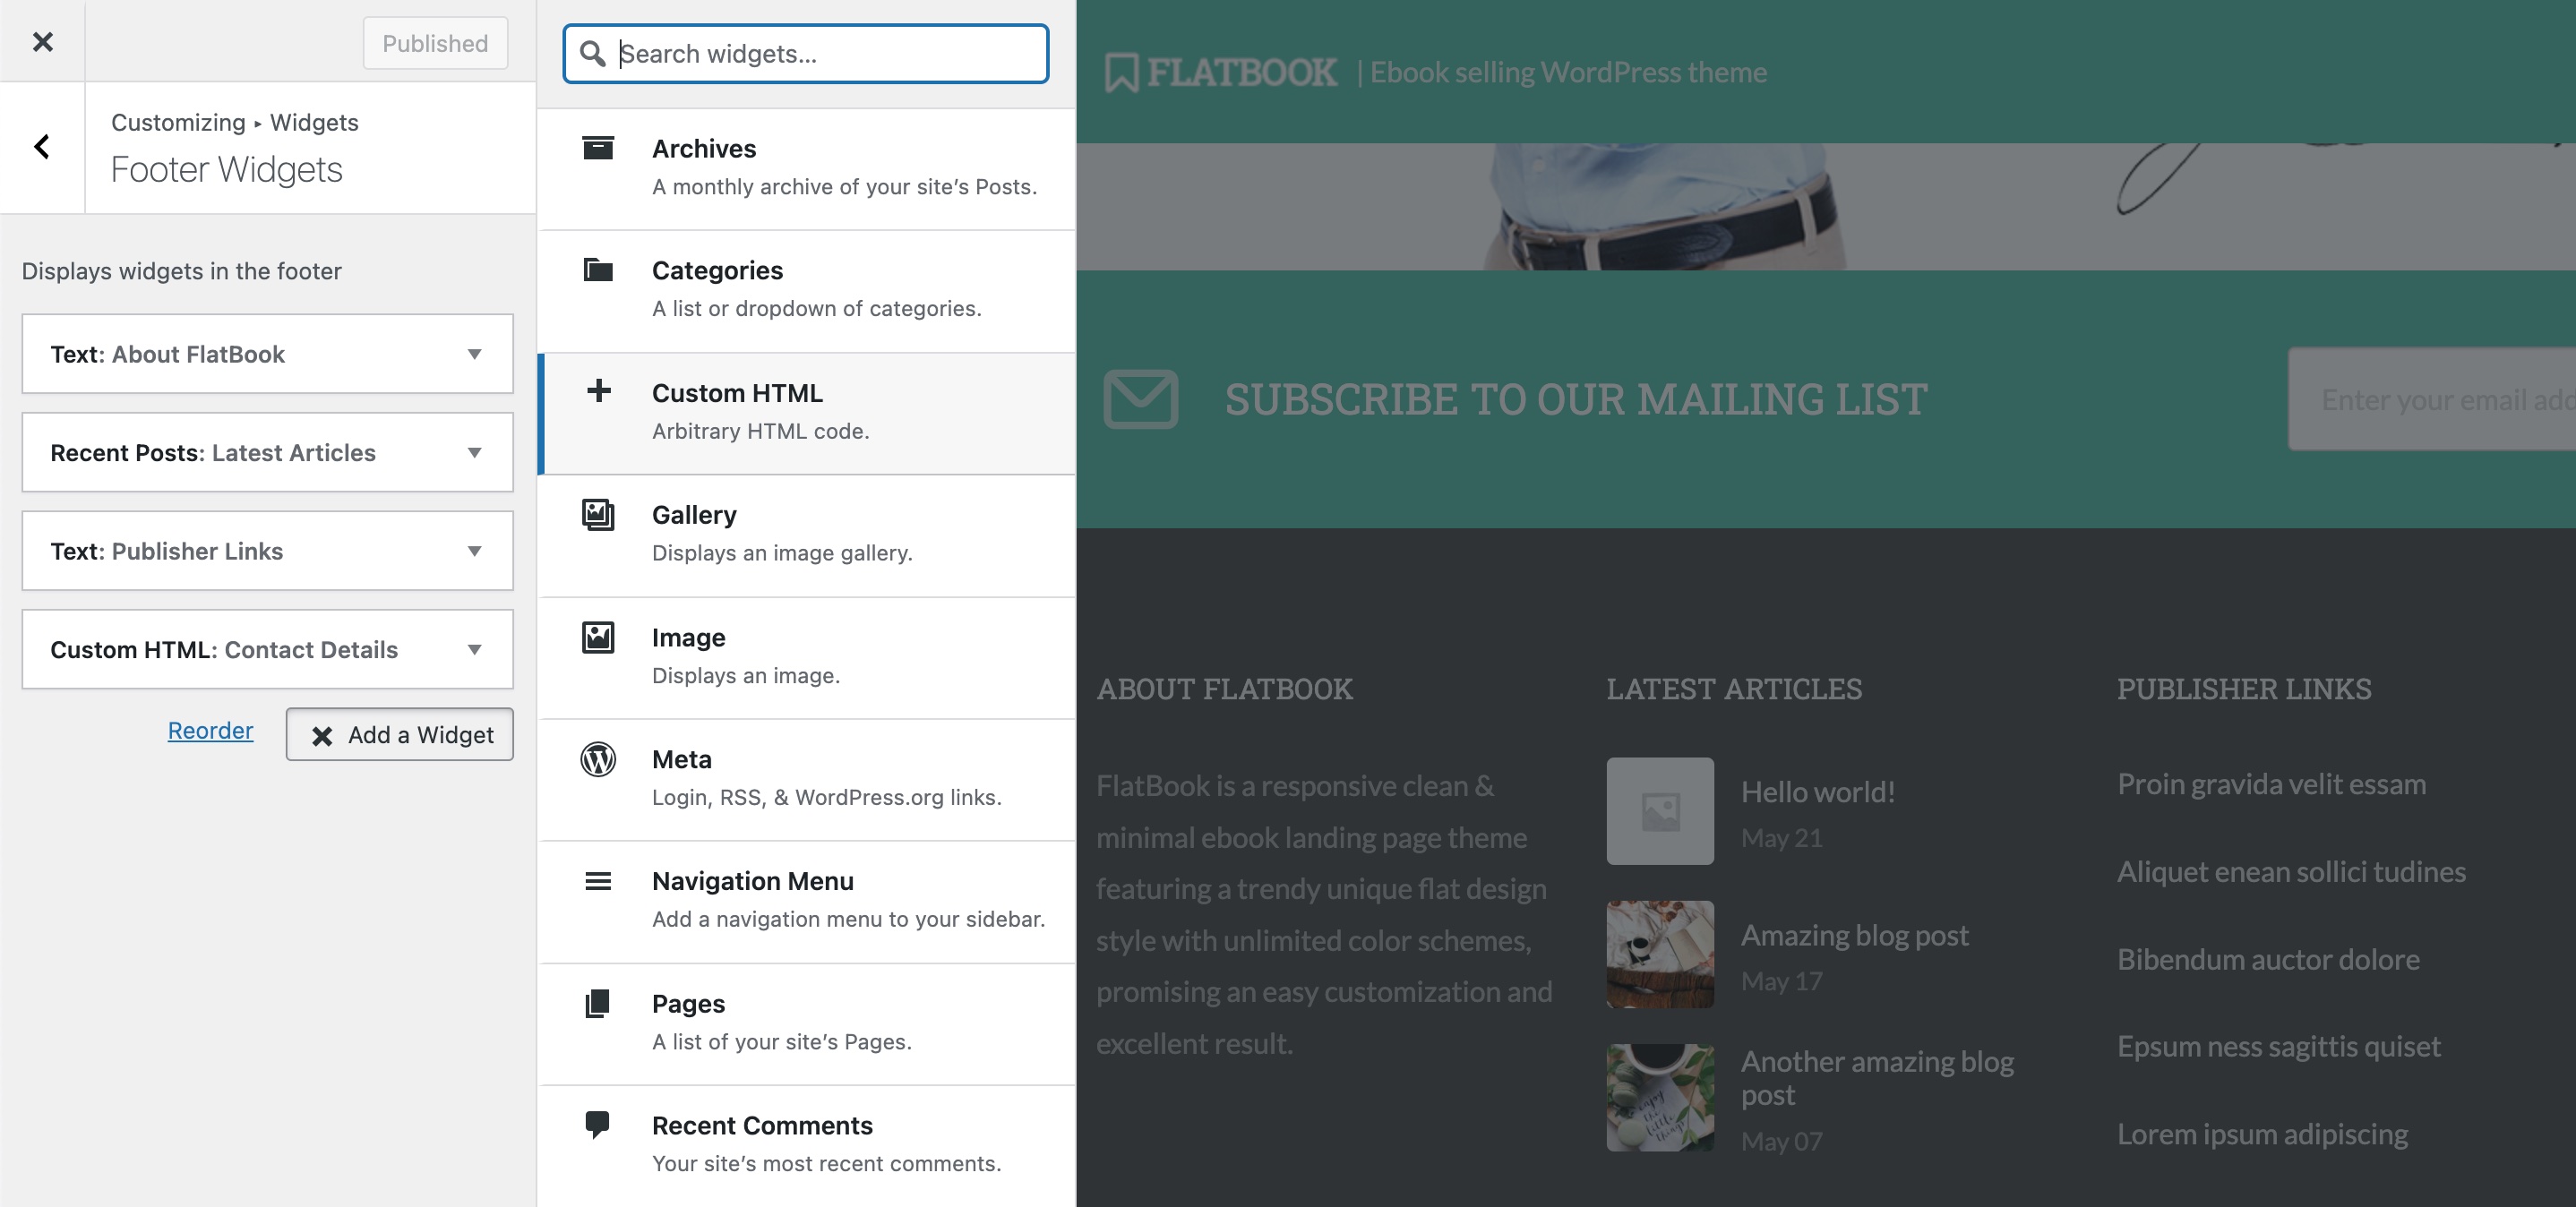
Blog Sidebar
This widget area is located in the sidebar of the Blog (posts page) and the Single Post page.
Note: you can only see the Blog Sidebar within the widget areas, if you are viewing the Blog or the Single Post page in the customizer.
Pages
FlatBook uses Elementor for building pages, which is the #1 web creation platform for WordPress. If you're just getting started with Elementor, it's h recommended for you go through their getting started documentation.
Elementor Builder
Important notes on Elementor Page Builder:
- Once you start building your pages with Elementor, you can't switch to another builder, because the elements and their styling will be lost when disabling Elementor
- FlatBook is build for Elementor exclusively, so if you plan to use a different page builder, this theme might not suit you
- All theme features use Elementor's free version, so it is not required to buy Elementor Pro
- Elementor settings will replace the default settings coming from the Theme Customizer
Add New Page
Follow these easy instructions to create a new page:
- Navigate to Pages » Add New
- Enter the Page title (if Enable page headers option is set to true, it will show up on the page)
- Enter the Page description in the right sidebar, if you want it to show up below the page title in header
- Click on the Edit with Elementor button and start editing
Page Templates
FlatBook does not have custom page templates, but you can use the default page templates of Elementor:
- Elementor Canvas: use this if you want a completely clean, blank page to start from
- Elementor Fullwidth: use this if you want to have a blank full width page with header, navbar and footer
- Default Template & Theme: use these if you want to add elements inside the default page wrap
Page Header
There are several customizing option for the global header of pages.
To edit it, go to Appearance » Customize » Header » Page Header setting.

Edit Pages
There are several ways to edit a page with Elementor. You can create your own content from scratch, however it is recommended for beginners to copy an existing element coming from the imported demo content, and customize it.
Enable Handles
For the most easy usuage, you should enable editing handles.
- In the Elementor editor, click on the sidebar toggle icon at the left top of the page
- In the upcoming sidebar, select User Preferences
- Switch on the Editing Handles option and click on the Update button
Edit Elements
To edit an element, just click on it and customize the upcoming settings in the left sidebar and click on the Update button to save the modification.
Duplicate Elements
To create a copy of an element, hover over the edit icon in the top right, and hit the upcoming Duplicate icon (or just right click on the element and choose Duplicate).

Note: This method can be used with Elementor elements, columns, sections... basically everything.
Elementor Widgets
The theme comes with 4 custom Elementor widgets, bundled in the flatbook-elementor-widgets plugin. You can look for them typing the "flatbook" keyword in to the widgets search field, while you are in the Elementor editor.
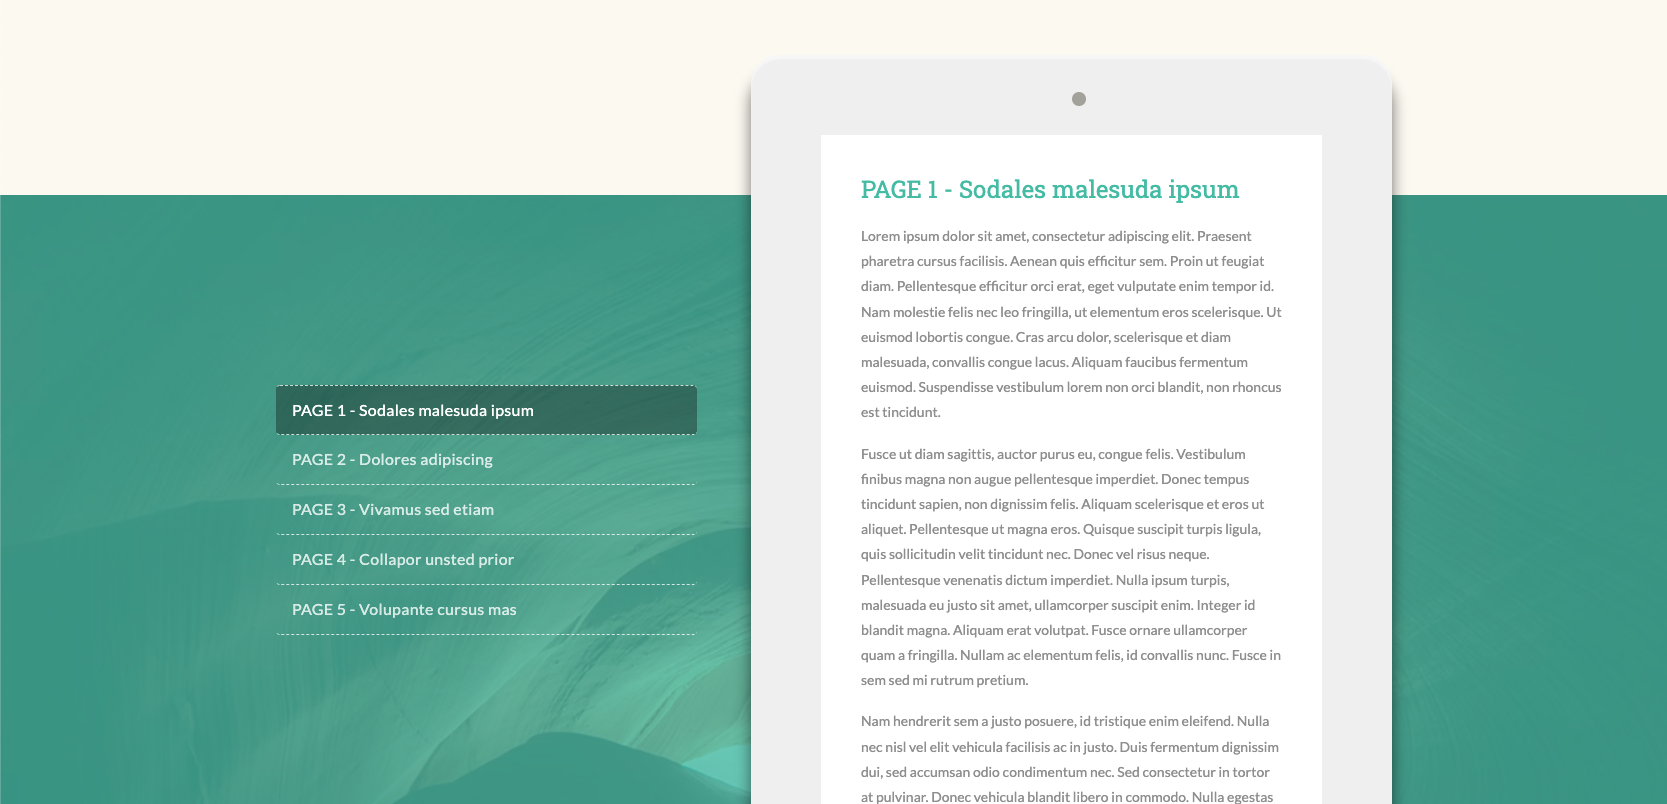
Samples
This widget adds a section with a tablet which previews your sample contents added in tabs:
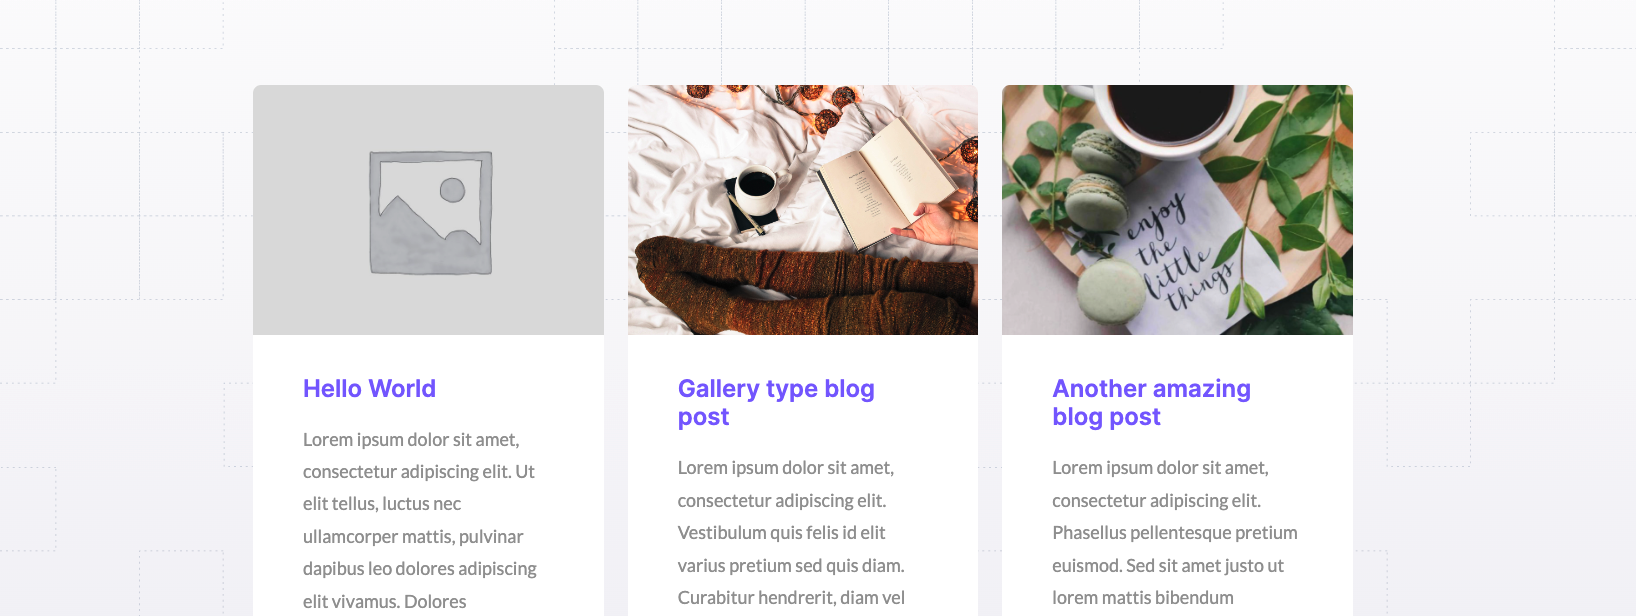
Latest Posts
This widget adds a section with the most recent posts displayed in 2-4 columns:
Highlight Title
This widget adds a heading title with custom word highlighting options:

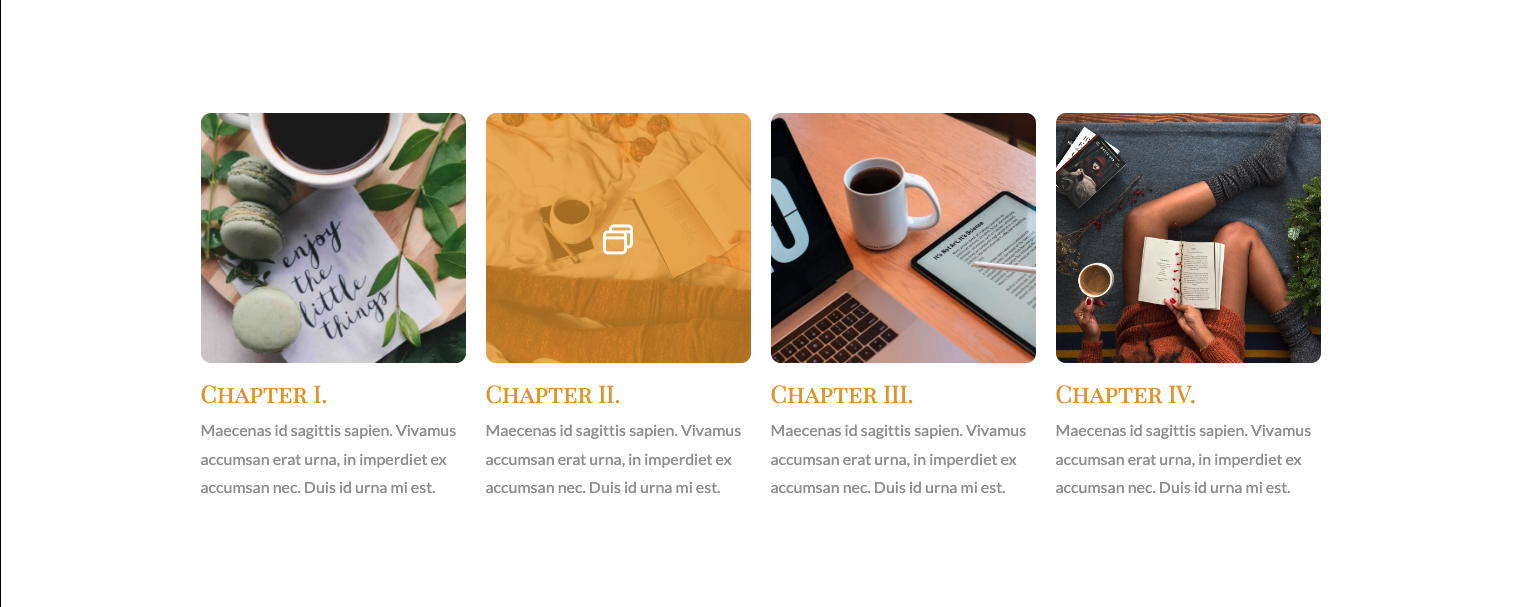
Chapter Overviews
This widget adds an image box with a lightbox, where you can add your sample chapter overview content:
Setup Subscribe Form
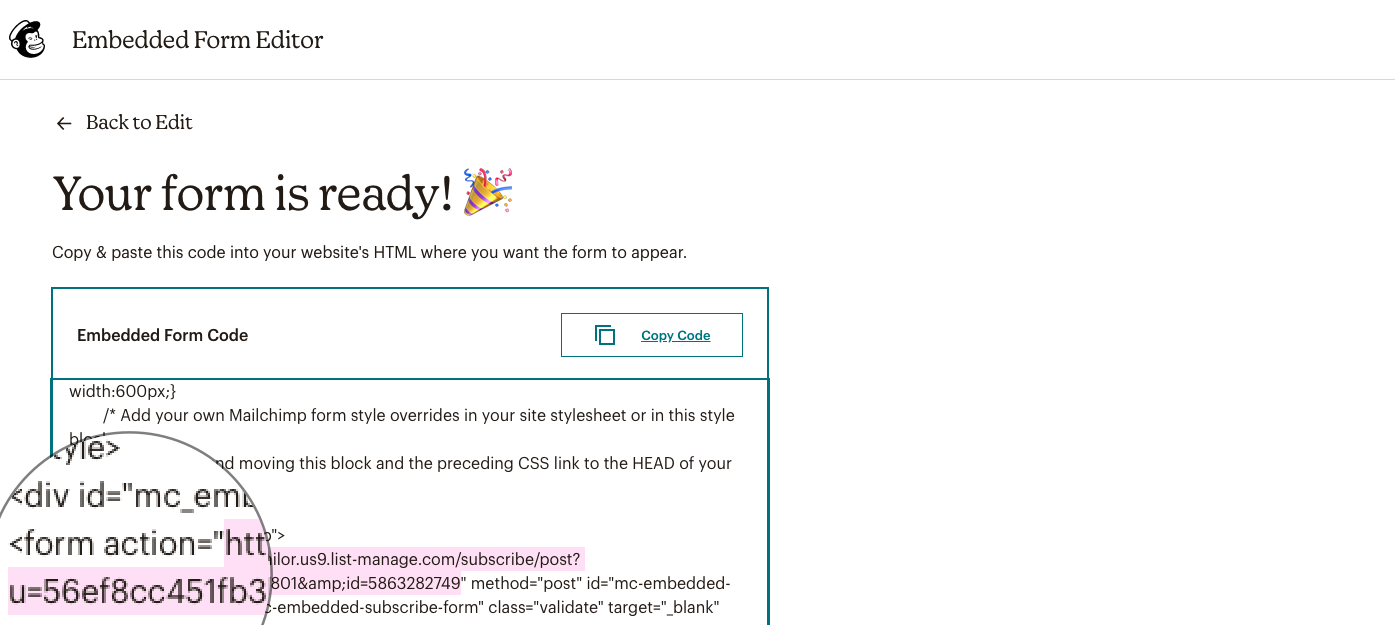
The theme features a MailChimp newsletter signup form located in the subscribe footer bar. To get it work, you need to get your custom MailChimp URL, here is how to do that:
- Create a new MailChimp account, or log in to your existing one
- On the start page, select Audience from the left sidebar and click on Signup forms
- Select the Embedded forms option
- In the upcoming page, leave everything as it is, and click on Continue button
- Now your embedding code will present. Scroll it down until you find the
<form> tag
- Your MailChimp URL is the link inside the
action="..." attribute, between the parenthenses
- Enter your custom link to Appearance » Customize » Footer » Subscribe in the MailChimp URL field.
Setup Contact Form
The theme features a basic contact form on the Contact page in the demo content. To make it work, you will need to modify the recipient email address of each form you have. See an example:
- Navigate to Contact » Contact Forms
- Select the first form in the list, and click the Edit link below the title of the form
- Modify the fields in the Form box if needed
- Select the Mail tab from the top, and enter your email address in the To field
- Click Save and repeat the method with the rest of the forms (if you have more)

You can read more about the additional settings of Contact Form 7 in the official plugin documentation.
Setup Paypal Button
To setup a PayPal button for your pricing section, follow these steps:
- Create a PayPal account where you will receive the payments
- Log in to your newly created PayPal account, and select Pay & Get Paid » PayPal Buttons from the main menu.
- Select Smart Buttons from the options, and set up the button details:
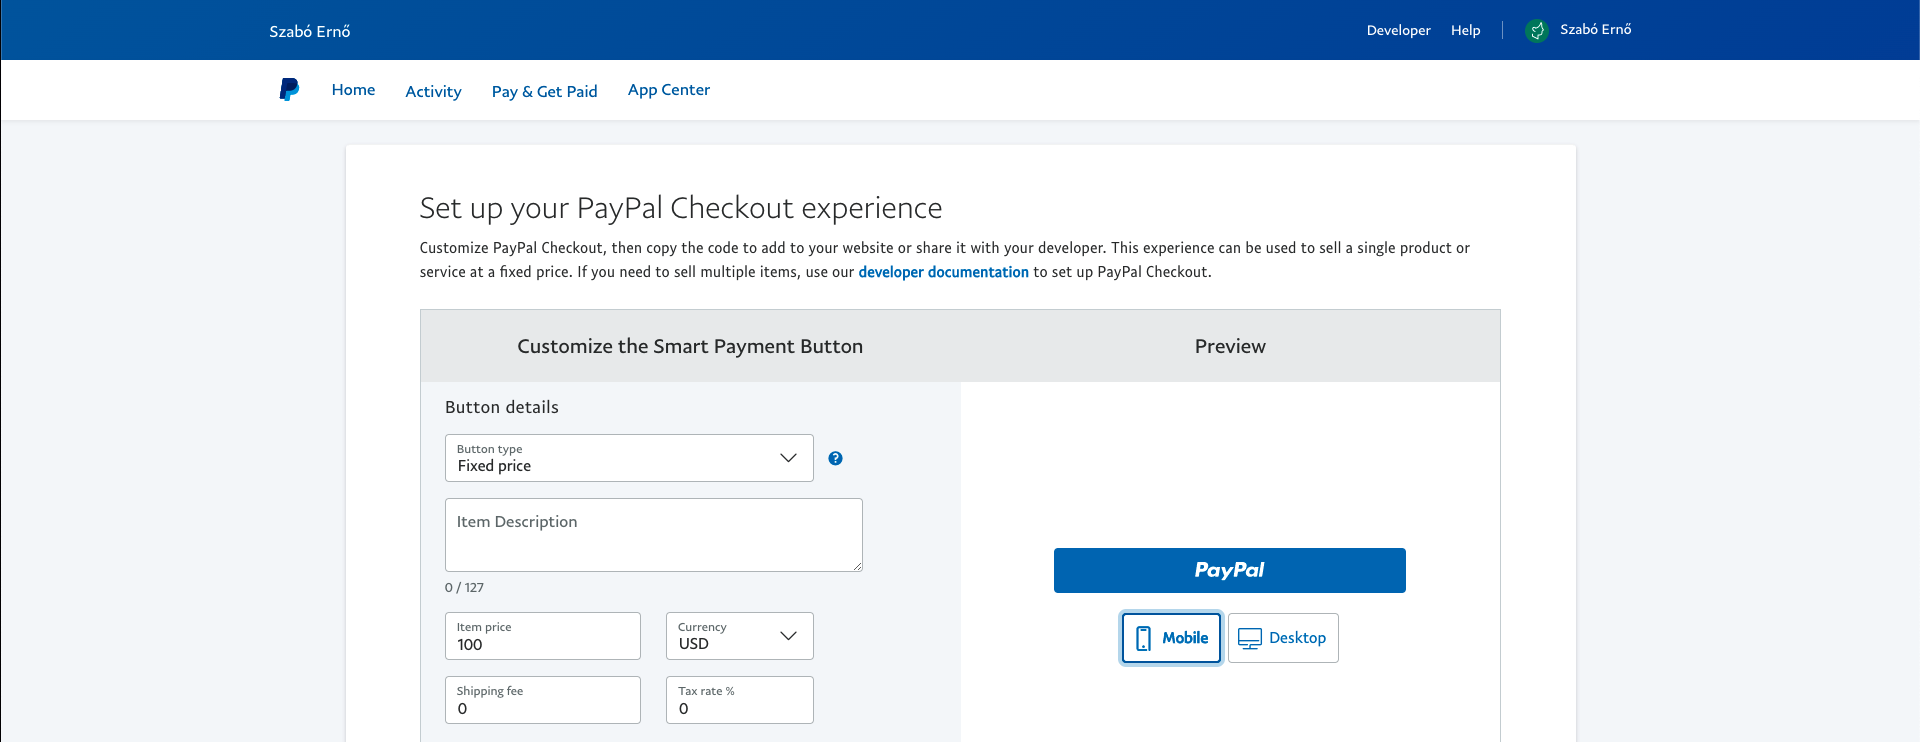
- If you are ready, click on the Copy Code button
- Go to the page where you have the pricing section, and Edit with Elementor
- Insert a HTML widget (to the place where you have the Purchase button) and paste the copied code. Don't worry if Elementor doesn't render your PayPal button, it will look as expected on the frontend.
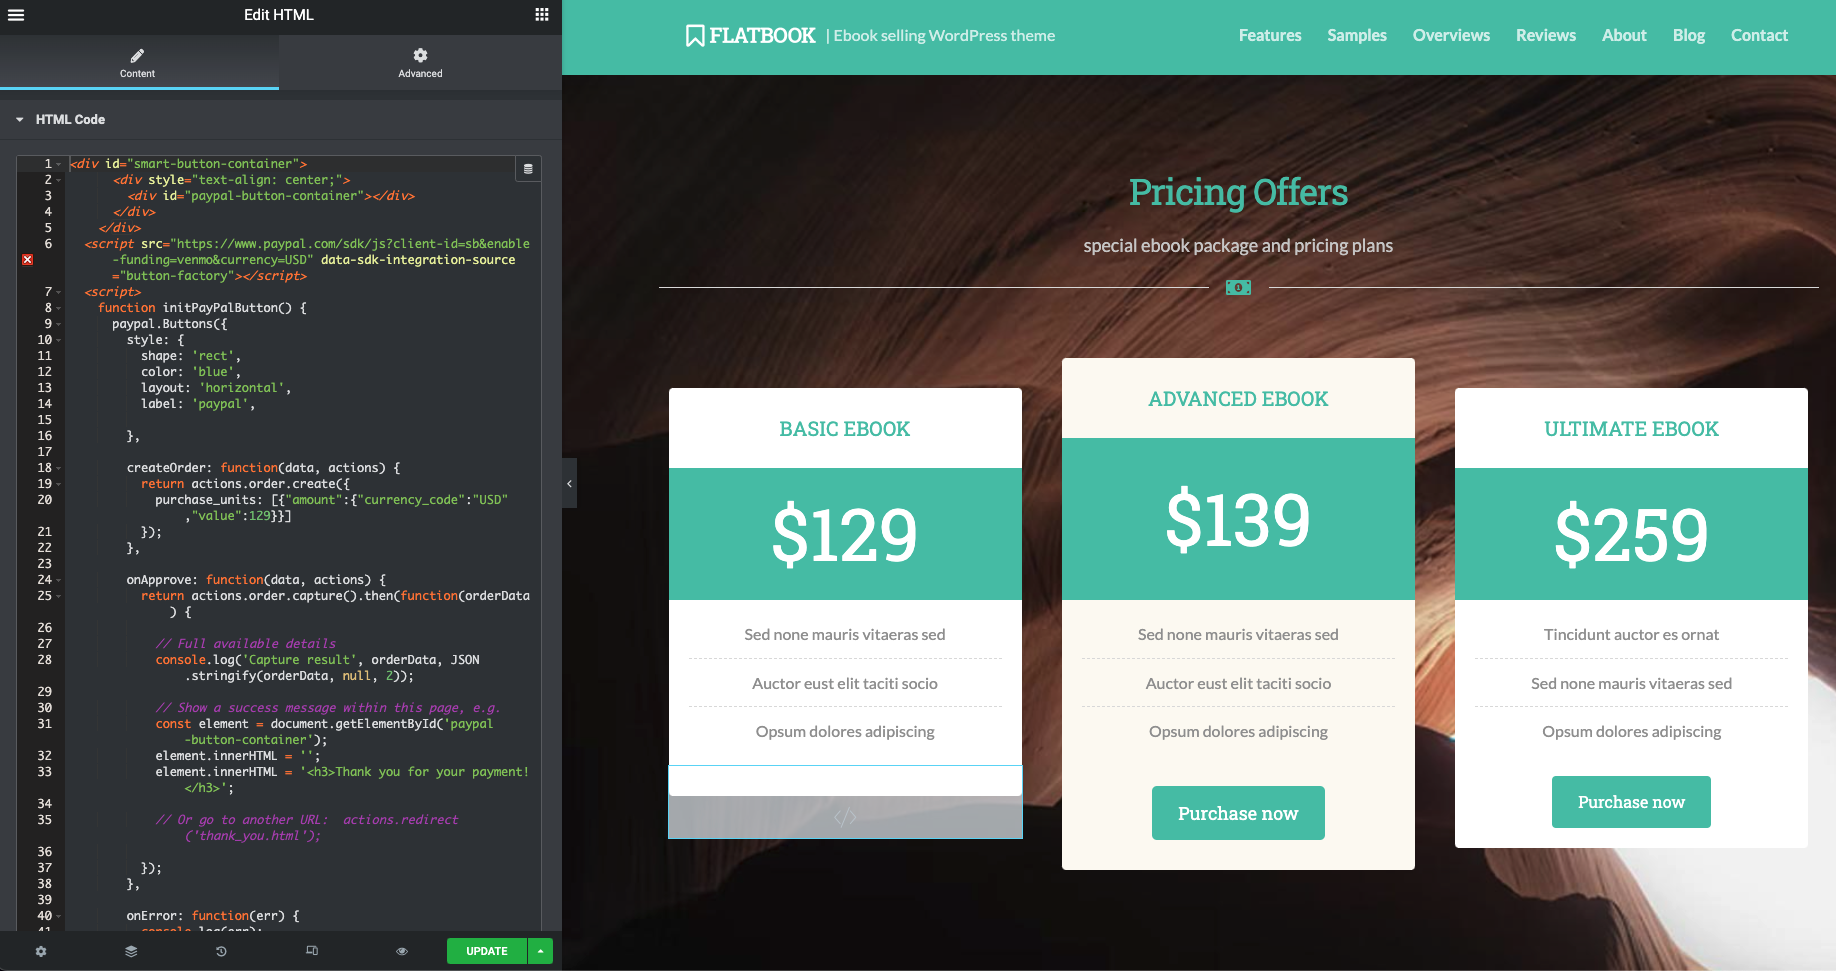
- Copy the purchase button with right click and paste it's style to the inserted HTML widget
- Delete the original purchase button, and hit Update to save the changes, than you are ready to accept payments!
- Do the same process with the other pricing options (if you have).
Add Menu Icons
To add icons before navigation menu items, follow these steps:
- Go to Appearance » Menus and click on a menu item to dropdown it's options
- In a new browser tab, open Uniicons website, and choose your icon
- Add the name (only) of the chosen icon to the Menu Icon field (for example:
airplay)
- Add icons to other menu items (if you need) then click Save Menu
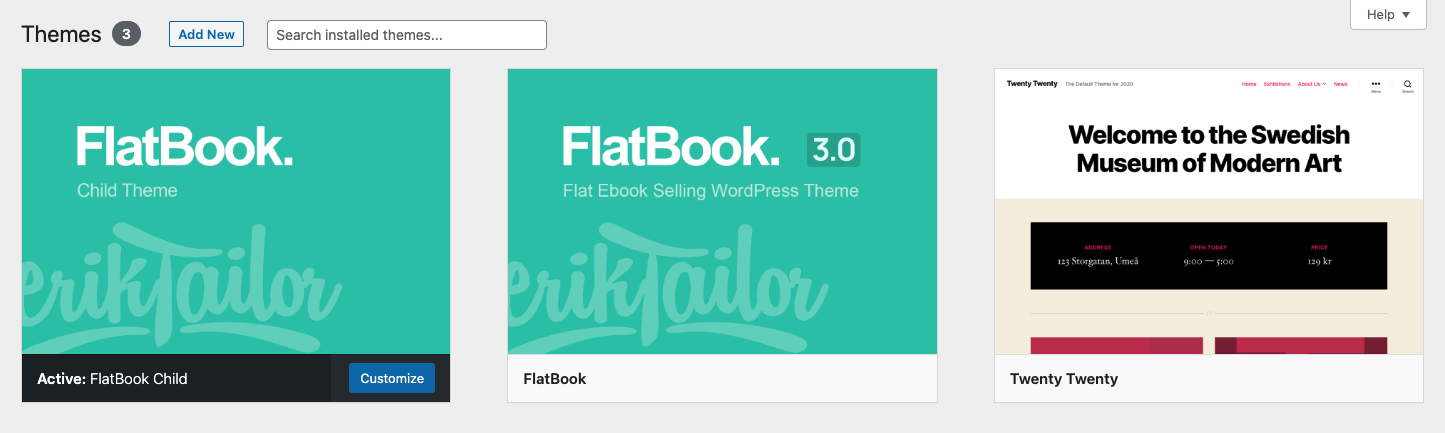
Using Child Theme
As you may know, a child theme is a theme that inherits
the functionality and styling of the parent theme. Using child themes are a popular way of modifying the
source code of an existing theme without risks.
If you already have some experience with WordPress - and decided to use FlatBook with a child theme - feel
free to install the flatbook-child.zip archive from the /Theme folder of the main
package, you downloaded from ThemeForest.
Update Theme
Note: If you would like to use the latest 3.1 update, and you are using an older version of FlatBook (before v3.0), when you update the theme you will have to create your website again.
If you already have a website created with an older version of FlatBook (< 3.0) and want to use the current version, you will have to create your content again. It's really important to create a safety backup of your existing website and database before doing anything, so if something may went wrong while recreating your contents, you can easily set everything back to the default state. For this purpose, you can use one of the free backup plugins from the WordPress plugin directory,
like All-in-One WP Migration than install the new theme files.
There are two ways of updating the theme to the latest version, you can learn more about them below.
Manual Update
- Check the current version number of the theme in the changelog
- Go to Appearance » Themes and comprare your theme version number with it
- If different, dowload the current build of the theme from ThemeForest
- Extract the theme package and unzip the main theme file
flatbook.zip
- Connect to your server via FTP and replace the original theme folder with the new one at ../wp-content/themes/
Envato Market Plugin
- Download and install the Envato Market WordPress Plugin
- Activate the plugin and follow the steps below the Getting Started (Simple) box
- Enter your Envato API Personal Token and click on Save Changes
- Select the Themes tab at the top, and the update will be shown (if have)
Translate Theme
The theme is completely translation ready, to translate it to your own language, you will need a .po editor
software like Poedit. Here is how you can do it:
- Locate your
default.pot file from the /flatbook/languages/ folder
- Duplicate the file and rename it to
xx_XX.po where 'xx' is the localization code of your language (eg. fr_FR is french)
- Open the duplicated po file with Poedit, and translate the desired strings to your own language
- Once feel ready, just save it in the same directory
Using Sass Files
The main stylesheet of the theme is called flatbook.css located in the /assets/css/
folder. To catch up with the latest coding standards, FlatBook was written in Sass markup language. If you wish to modify the source .scss files and compile the main theme stylesheet again, feel free to watch the source files, located in the /assets/scss/ folder.
It is highly adviced to use the Online Autoprefixer tool on the css file, after you done working with it.
Using Custom Icons
FlatBook is integrated with Uniicons which has 4500+ free vector icons. If you would like to use a custom icon anywhere around the theme, you can just copy the code from the linked website and paste it in the code of the desired part.
For example, it is used in the "Contact Details" part of the Footer Widgets: <i class="uil uil-airplay"></i>